Frequency Separation vs Dodge and Burn: Which Retouching Technique Should You Use?
If you have ever zoomed in on a portrait in Photoshop and wondered how professionals get skin that looks flawless but still human, the answer almost always comes down to two techniques: frequency separation vs dodge and burn. Every retouching tutorial eventually lands on this fork in the road, and every photographer learning retouching asks the same question: which one should I learn?
Here is the short answer I give photographers who ask me: learn both, but understand what each one actually does first. Frequency separation and dodge and burn solve different problems, they work at different speeds, and using the wrong one for the job is the fastest way to get that overworked, plastic look that ruins otherwise great portraits. In this post, I will break down seven real differences between them, explain exactly when each one wins, and show you why most working retouchers use them together. I have also included a full video walkthrough of the dodge and burn technique below so you can watch it done at a professional level.
In this post:
- What Frequency Separation Actually Does
- What Dodge and Burn Actually Does
- The 7 Key Differences
- When to Use Both Together
- My Retouching Workflow After 27 Years
- Frequently Asked Questions
- The Takeaway
What Frequency Separation Actually Does
Frequency separation is a technique that splits your image into two layers: a high-frequency layer that holds texture and fine detail (pores, hairs, the weave of skin), and a low-frequency layer that holds color and tone (blotches, redness, shadows, uneven patches). Once the image is split, you can edit each layer on its own.
The idea is simple and genuinely clever. Skin problems are almost always color and tone problems: redness around the nose, blotchy patches on the cheek, dark under-eye circles. If you could smooth those out without touching the pores and fine hairs that make skin look like skin, you would get clean, even skin that still reads as real. That is exactly what frequency separation lets you do. You soften the color layer while the texture layer stays untouched.
The standard setup, documented in detail in the Photography Icon retouching guide, starts with two duplicate layers. On the lower one you apply a Gaussian Blur with a radius just big enough to melt the skin texture but keep larger features (typically 4 to 8 pixels on a high-resolution portrait). On the upper layer you use Image > Apply Image with Subtract blending, Scale 2, Offset 128, and set the layer to Linear Light. From there, a soft low-opacity brush on the low-frequency layer evens out color transitions, and the Clone Stamp on the high-frequency layer fixes texture problems. The result is smooth, even skin that keeps every pore.
That is the honest explanation of what the technique does. It does not do magic, and it has a well-documented failure mode: overused frequency separation makes skin look like the skin of an orange, with visible separation artifacts. Fstoppers photographer Patrick Hall makes the same point in his Dodge and Burn versus Frequency Separation comparison, calling overdone frequency separation one of the easiest kinds of bad retouching to spot.
What Dodge and Burn Actually Does
Dodge and burn is the older of the two techniques, inherited from darkroom printing, where printers would hold back light (dodge) or add extra exposure (burn) to specific areas of the print. In Photoshop, the digital version is the same idea: you selectively lighten and darken small areas of the image to even out tone, sculpt features, and shape light.
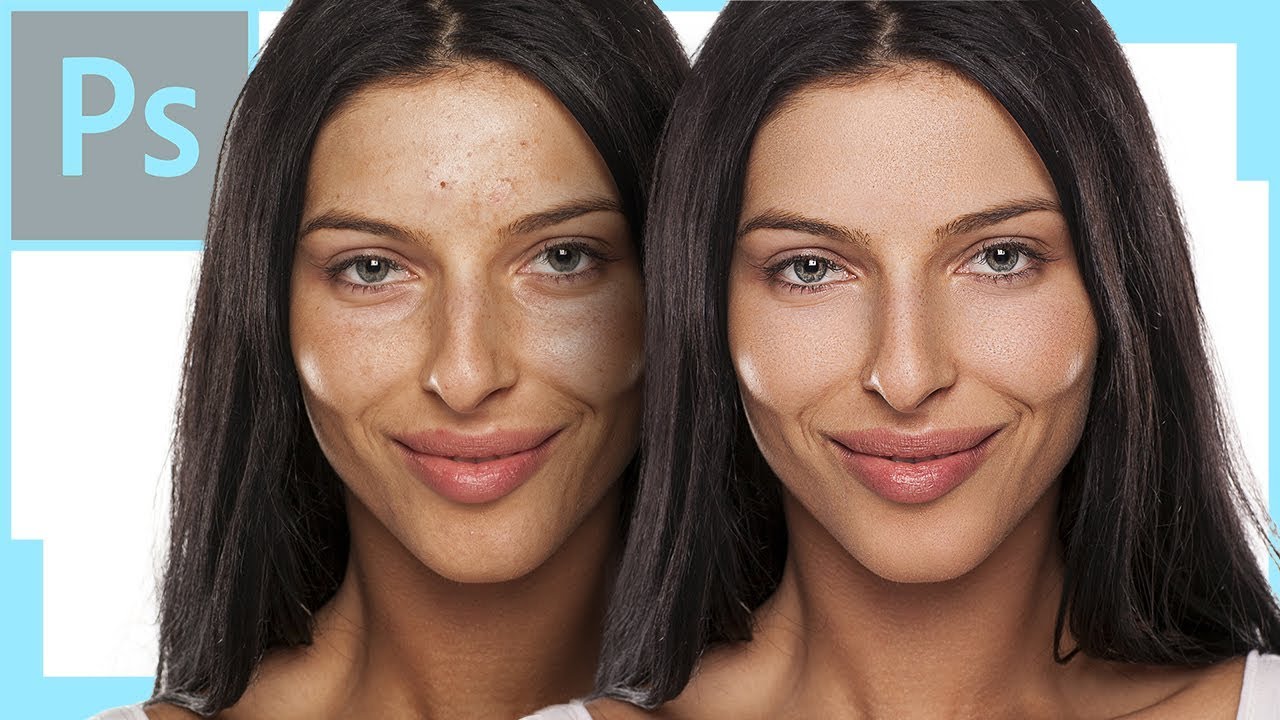
In practice, retouchers usually do this on a 50 percent gray layer set to Soft Light or Overlay, or with Curves adjustment layers, painting with tiny soft brushes at very low opacity (around 3 to 8 percent). You zoom in close, find a dark spot, lighten it slightly. Find a bright spot, darken it slightly. Then you do it again, hundreds of times. It is slow, methodical work, and it is the industry-standard technique for beauty, fashion, and commercial retouching, which is exactly what Unmesh Dinda of PiXimperfect demonstrates in the video below. His tutorial starts with blemish removal, then moves into extensive dodge and burn with Curves adjustment layers, and finishes by fixing skin color with blend modes. His verdict is honest: when you have the time, dodge and burn produces better results than frequency separation, because it creates realistic skin texture and soft, flawless skin at the same time.
The critical fact about dodge and burn is this: it does not alter skin texture at all. It only changes luminosity. That is why top retouchers trust it for the highest-paying work. A well-known retoucher quoted in the Fstoppers skin retouching feature puts it this way: good retouching should be undetectable, like you never noticed it coming. Dodge and burn, done well, leaves pores, hairs, and micro-texture completely intact. Nothing is blurred. Nothing is smoothed. You are simply reshaping light, pixel by pixel.
The 7 Key Differences
1. What each technique changes
Frequency separation divides the image into texture and color so you can work on each independently. It is fundamentally a separation technique: you decide which half of the image data to touch. Dodge and burn never separates anything. It works directly on light and dark, nudging luminosity up or down across the whole image. If your problem is uneven color (blotchiness, redness, under-eye darkness), frequency separation addresses it directly. If your problem is uneven light (a shiny forehead, harsh shadow under the chin, flat facial contours), dodge and burn is the tool.
2. Speed
Frequency separation is fast. Once the layers are set up, which takes about a minute with an action, you can even out large areas of skin quickly. This is why it dominates everyday client work: headshots, senior portraits, event galleries where you have dozens of faces and limited time. Dodge and burn is slow by design. Professional beauty retouchers regularly spend 30 to 60 minutes or more on a single image with micro dodge and burn, according to the Photography Icon guide's time estimates. Speed matters because time is the one resource you cannot fake, and the technique you choose should match the budget the job allows.
3. How natural the skin looks
This is the difference clients actually see. Because dodge and burn never touches texture, it cannot produce the plastic look. The worst outcome of a bad dodge and burn job is uneven lighting, not fake skin. Frequency separation, on the other hand, has a recognizable failure mode. Push the blur radius too far or paint too aggressively on the low-frequency layer, and the texture starts to separate from the color in a way the eye reads as waxy or artificial. As the Fstoppers comparison notes, overused frequency separation gives skin the look of an orange. For the absolute highest-end beauty and cosmetic work, where the image will be printed large or scrutinized at a cosmetics counter, dodge and burn remains the standard.
4. The learning curve
Frequency separation has a mechanical setup and a conceptual payoff: learn the layer stack once and you can get decent results quickly. The hard part is restraint, knowing when to stop painting. Dodge and burn is the opposite. The setup is trivial (a gray layer and a soft brush), but the judgment is everything. You need to read light on a face, understand how highlights and shadows describe bone structure, and make thousands of tiny decisions without losing the thread. That is why experienced retouchers say dodge and burn takes longer to learn but rewards you forever.
5. Fixing versus enhancing
Here is the cleanest way to decide. Frequency separation is a fixing technique. Blemishes, spots, dust on clothing, lint, uneven patches: it removes what should not be there. Dodge and burn is an enhancing technique. It sculpts what is already there, bringing out cheekbones, softening a jawline shadow, adding dimension to flat lighting. The Fstoppers comparison frames it the same way: frequency separation cleans up and manages imperfections, while dodge and burn shapes and sculpts the sitter's features. Most portraits need some of both, which is exactly why professionals keep both in their workflow rather than picking a side.
6. Forgiveness and revision
Both techniques should be done non-destructively, on separate layers you can mask, reduce in opacity, or delete entirely. But they fail differently. A bad frequency separation pass often needs to be redone from scratch, because the artifacts are baked into the relationship between the two layers. A bad dodge and burn pass can usually be rescued by lowering the layer opacity or masking out the offending strokes, since each stroke is just a small change in brightness. When I am under deadline, that forgiveness matters.
7. Which jobs pay for which
For volume client work (a 40-person corporate headshot day, a wedding gallery, a senior portrait season), frequency separation plus careful healing work is the professional standard. It delivers clean, flattering skin at a speed that keeps the business profitable. For hero images (a magazine beauty portrait, an advertising campaign, a portfolio centerpiece, a cosmetics ad), dodge and burn is what the top tier charges for. It takes longer, and that time is exactly what the client is paying for. Retoucher Tamara Williams makes this practical distinction in her frequency separation versus dodge and burn guide: use frequency separation when you need efficient skin cleanup, and dodge and burn when you need to sculpt depth and dimension.
When to Use Both Together
The honest answer most tutorials bury: the best retouchers do not choose. They stack. A standard professional sequence looks like this. First, clean up blemishes and distractions with the Healing Brush and Clone Stamp on a fresh layer. Second, use frequency separation on the low-frequency layer to even out blotchy color, redness, and under-eye tone, while leaving the high-frequency texture layer alone. Third, switch to dodge and burn for fine luminosity work: evening out micro transitions, sculpting the light on the face, adding the dimension that makes a portrait feel three-dimensional instead of flat. Fourth, zoom out, toggle the layers on and off, and check the before and after at normal viewing size.
That last step deserves emphasis. The Photography Icon guide recommends three habits that separate amateurs from professionals: zoom out frequently to check the work at the size people will actually see it, toggle your retouching layers against the original, and walk away for 30 minutes before the final pass. If the difference between before and after is dramatic, you have gone too far. Good retouching is invisible. The viewer should see a beautiful photograph, not evidence of editing.
My Retouching Workflow After 27 Years
This is the part no tutorial can give you, so I will give you the honest version of how I think about this after 27 years of shooting portraits, fashion editorials, and celebrities for magazines including Vogue and Harper's Bazaar.
Early in my career, I reached for the fastest tool every time. Deadlines were tight, galleries were big, and frequency separation felt like a superpower. And it is, for what it does. But somewhere along the way, I noticed a pattern in the images I was proudest of years later. The ones that held up were the ones where the retouching was restrained and the light was doing the real work. The ones that embarrassed me were the ones where I had tried to fix in Photoshop what I should have fixed on set.
My book has a line I still believe completely: I discovered what I was good at, and then I perfected my craft. Retouching is craft. The shortcut is tempting, and there is nothing wrong with working fast when the job requires it. But the images that built my reputation were built on discipline: getting the light right before the shutter fired, casting and working with good makeup artists so the skin started clean, and then treating post-production as polish, not rescue. The only thing consistent about this business is change, and the photographers who last are the ones who master fundamentals that do not expire with the next software update.
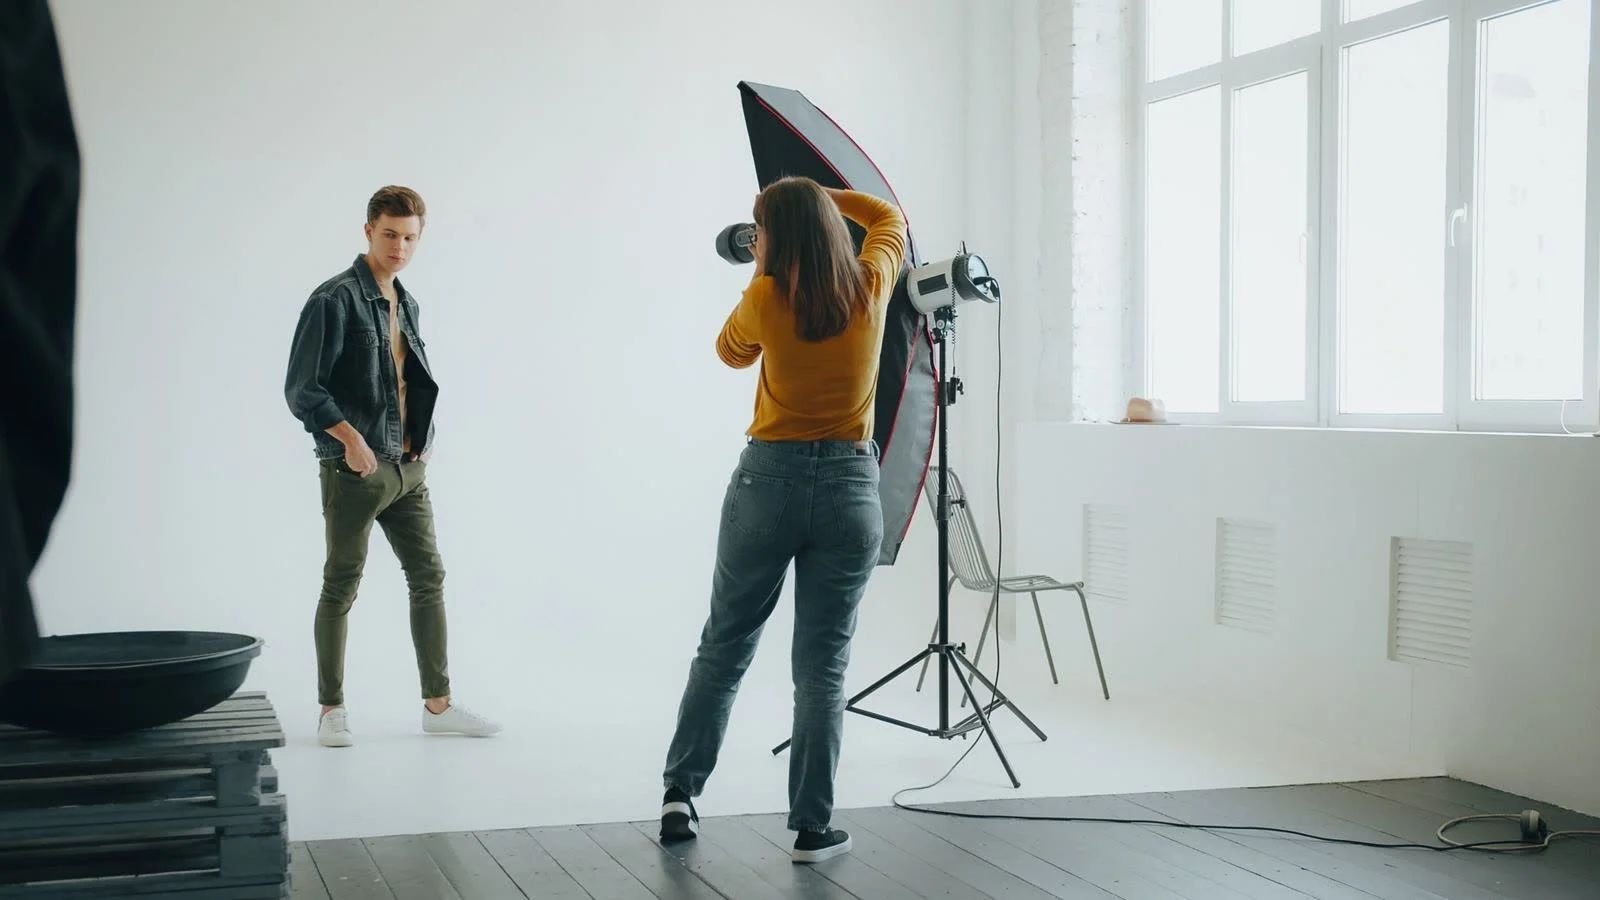
So here is my actual workflow, and it is less glamorous than any tutorial. It starts on set, with shaped light. A portrait lit with intention needs a fraction of the retouching of a portrait lit by accident. If you want to see what I mean about shaping light with a single source, my one light portrait setup guide shows the five looks I return to constantly, and every one of them reduces the hours I spend in Photoshop later.
In post, I cull ruthlessly first. Retouching time is precious, so I never retouch a frame that has not earned it. (My AI-first culling workflow covers how I get through thousands of frames fast.) Then I do global color and exposure work in Camera Raw before touching a single pixel of skin. Only then does retouching start, and my order is always the same: heal the temporary stuff (blemishes, stray hairs, the things that will not be there next week), frequency separation on the low-frequency layer for blotchy color if the image needs it, and then dodge and burn for the sculpting. I dodge and burn more than I burn, and I stop before I think I am done, because I have learned that my last 10 percent of retouching is usually the 10 percent that makes it look retouched.
One more thing, and I say this to every photographer who asks about retouching: talk to your client about expectations before you start. Some clients want every pore gone. Most, when they see the difference between heavy retouching and refined retouching side by side, choose refined. Especially for headshots, where the person has to recognize themselves in the final image, restraint is not laziness. It is professionalism.
Frequently Asked Questions
What is the difference between frequency separation and dodge and burn?
Frequency separation splits the image into a high-frequency layer (texture and fine detail) and a low-frequency layer (color and tone) so you can edit each independently, which makes it efficient for smoothing blotchy color while preserving pores. Dodge and burn selectively lightens and darkens areas to reshape light and sculpt features, changing only luminosity without altering skin texture at all.
Which technique should a beginner learn first?
Learn frequency separation first. The setup is mechanical and repeatable, and it handles the most common beginner problem, which is uneven skin tone, quickly. Once you are comfortable, start practicing dodge and burn on a 50 percent gray layer at very low brush opacity. It will feel painfully slow at first. That is normal. It is the technique that separates competent retouchers from exceptional ones, and the practice compounds.
Can you use frequency separation and dodge and burn together?
Yes, and most professional retouchers do. The standard sequence is frequency separation first for color and tone cleanup on the low-frequency layer, then dodge and burn for fine luminosity control and facial sculpting. Using both plays to each technique's strength: frequency separation is faster at fixing, dodge and burn is better at finishing.
How long should retouching take per portrait?
It depends on the job. A social media headshot might need 5 to 10 minutes of basic work. A magazine beauty portrait with full frequency separation, dodge and burn, and detailed eye and skin work can take 30 to 60 minutes or more. For client sets, a realistic plan is 3 to 5 minutes per image for basic retouching and 15 to 30 minutes for the selects that get detailed work. If you are spending an hour on every frame of a 200-image gallery, your pricing is wrong, not your technique.
The Takeaway
Frequency separation vs dodge and burn was never really a contest. They are a fork and a spoon, to borrow the Fstoppers framing: different tools for different jobs, and a professional carries both. Learn frequency separation for speed and cleanup. Learn dodge and burn for the day a hero image lands on your desk and needs to be flawless without looking touched. And build the habit that matters more than either technique: light it well on set, retouch with restraint, and check your work at the size the world will see it.
If you are a photographer who wants portraits with this level of care, I shoot headshots, fashion editorials, and celebrity portraits in Los Angeles. Book a session here.
Which technique do you reach for first, and what is the one retouching habit you are still trying to break? Leave a comment below, I read every one.