If you want to master portrait lighting patterns, start by studying the shadows instead of the light. A portrait lighting pattern is simply the arrangement of light and shadow across your subject's face, and six classic patterns have organized professional portraiture for close to a century: butterfly, loop, Rembrandt, split, broad, and short. Move the key light a few inches in any direction and the mood of the entire portrait changes. This guide breaks down each of the six patterns with exact light positions, the modifiers that suit each one, and when each pattern is the right call on a real shoot.
In this guide:
- What Is a Portrait Lighting Pattern?
- The 6 Classic Portrait Lighting Patterns
- Butterfly (Paramount) Lighting
- Loop Lighting
- Rembrandt Lighting
- Split Lighting
- Broad Lighting
- Short Lighting
- Bonus: Clamshell and Rim Light
- How to Choose the Right Pattern: 3 Questions
- You Only Need One Light
- What 27 Years of Reading Faces Taught Me
- Frequently Asked Questions
- Watch: The 9 Types of Portrait Lighting
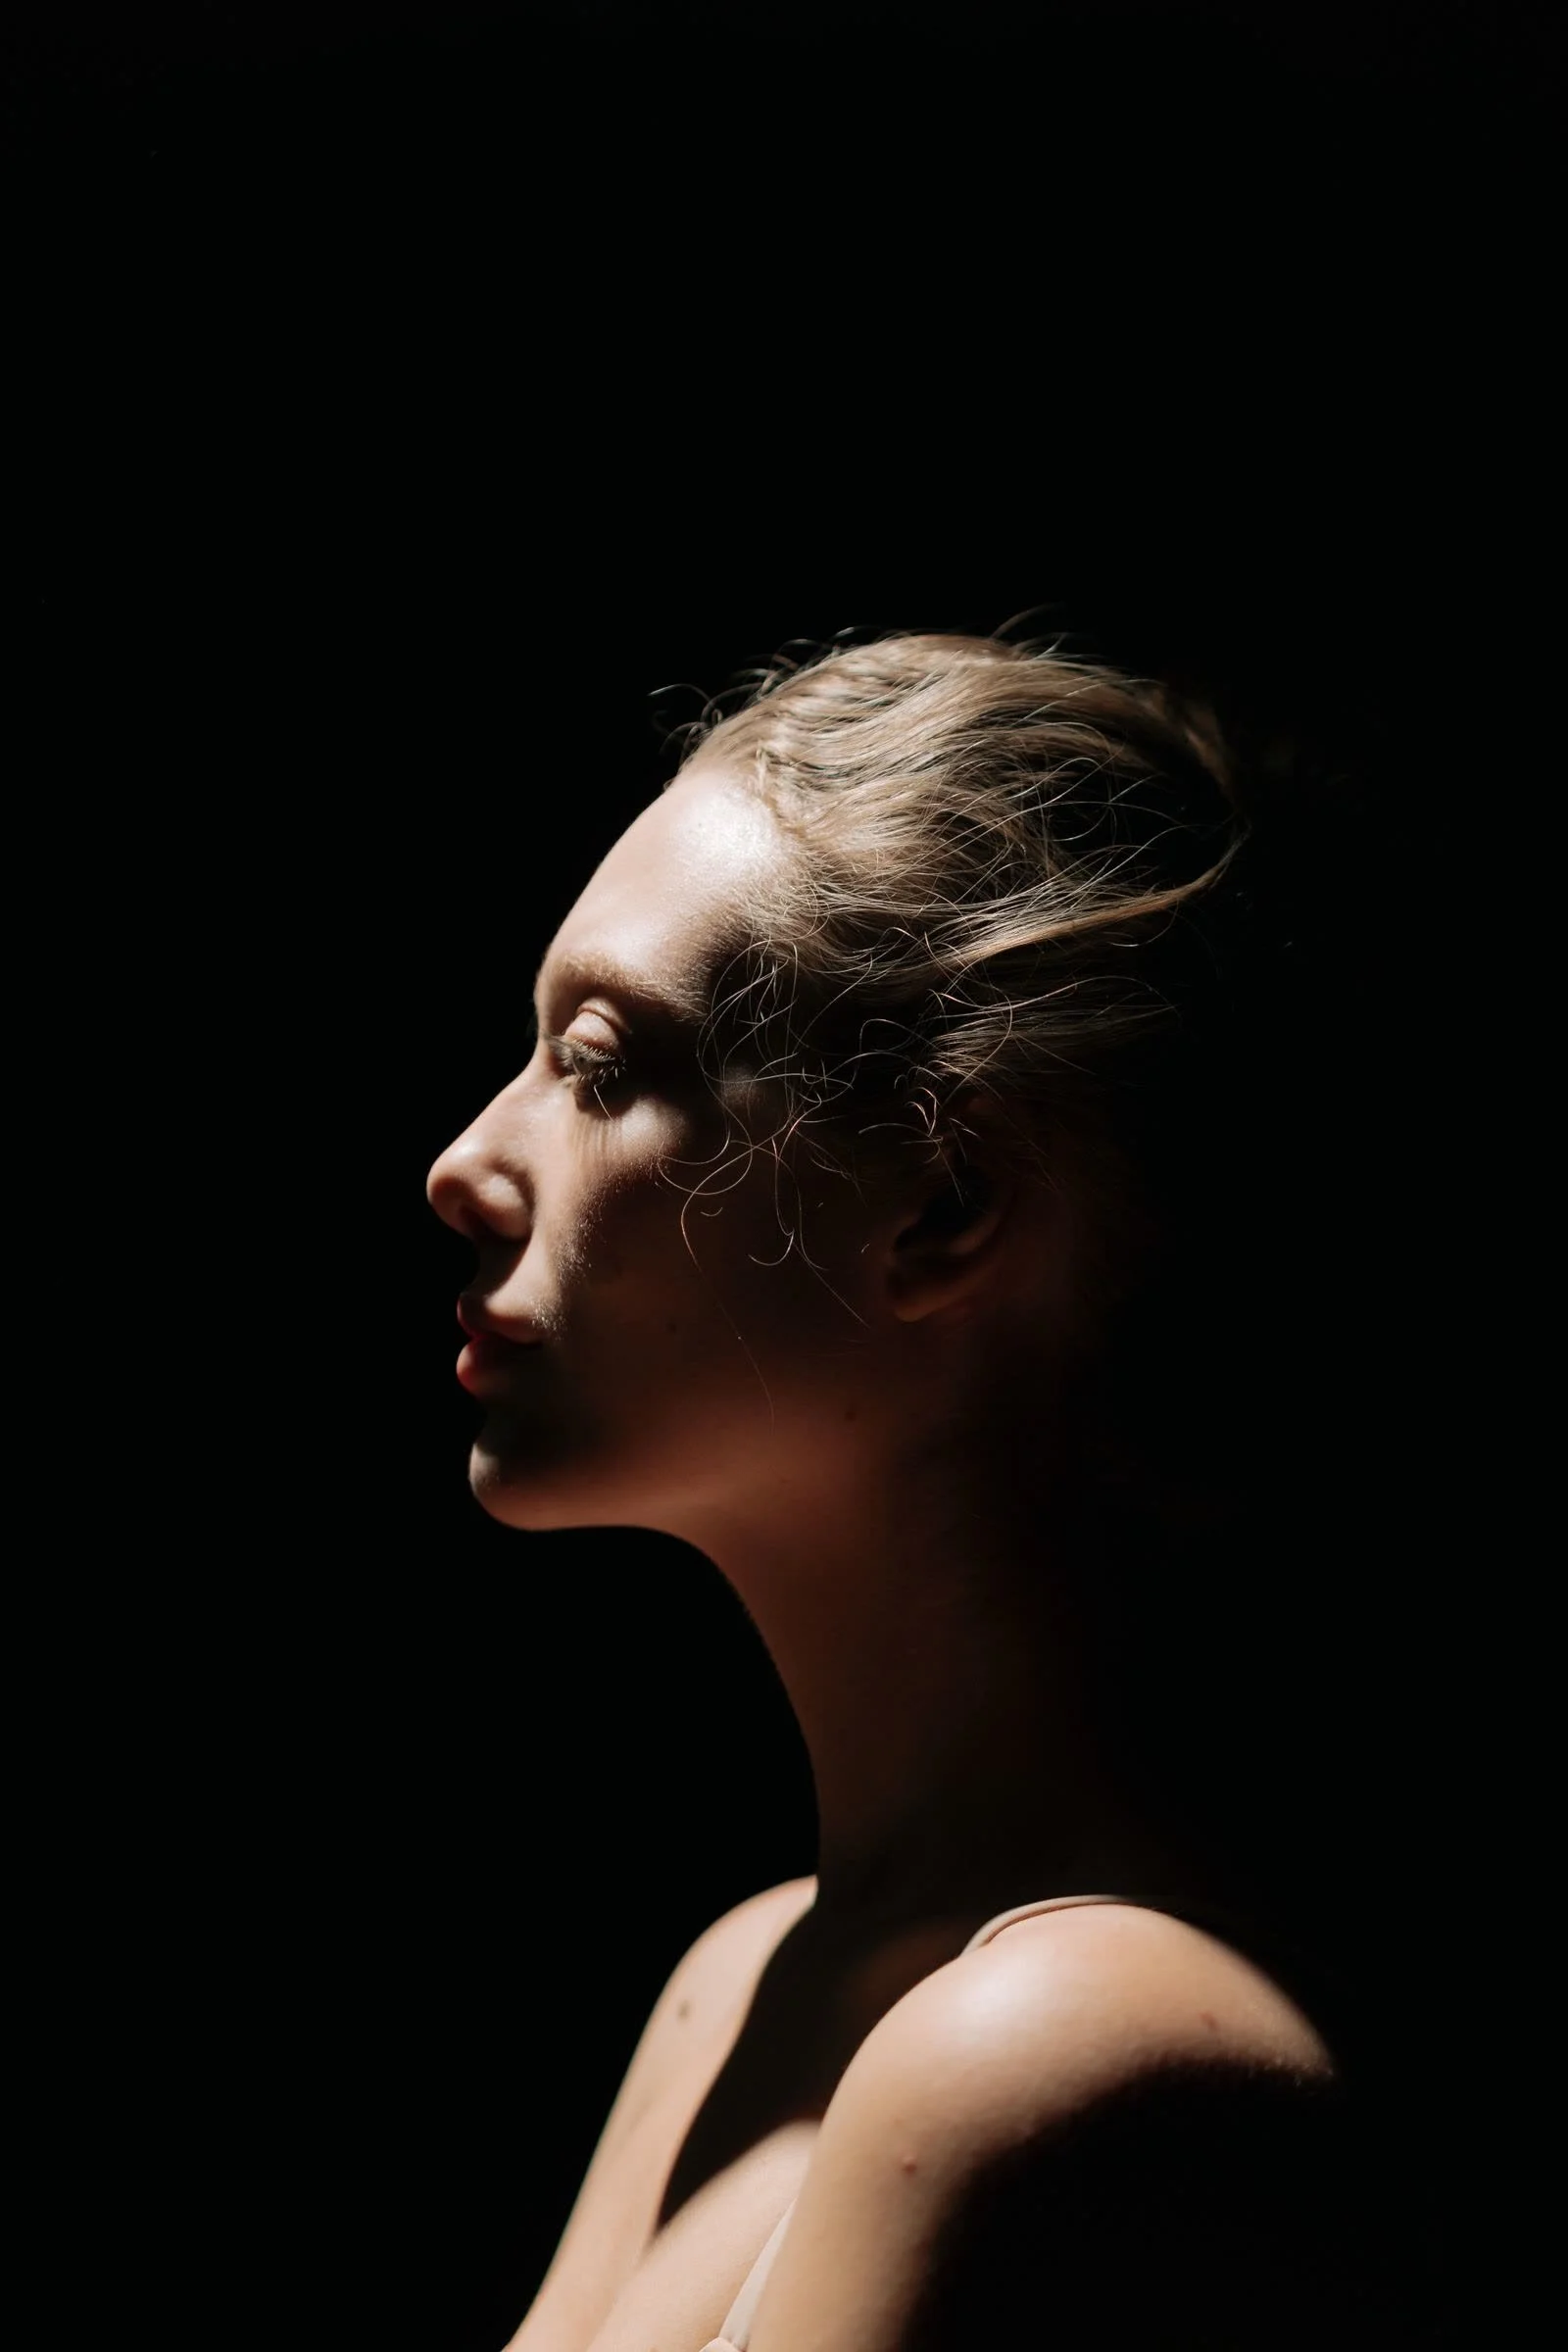
What Is a Portrait Lighting Pattern?
A lighting pattern is the specific arrangement of light and shadow on your subject's face, determined entirely by where you place the key light relative to them. The pattern is defined by position, not by price. A window, a speedlight, a strobe, or the sun can all produce any of these patterns. What matters is the angle and height of the source.
These named patterns exist so photographers have a repeatable, communicable system. When an assistant asks where to put the light, "loop, camera left, just above eye level" says everything. When you study a magazine portrait and identify Rembrandt lighting in it, you can recreate the look on your next shoot. For a printable studio reference covering eight patterns with placement diagrams, Photography Icon's complete lighting setup guide is worth bookmarking. The six classic patterns form a continuum from flat and flattering to dramatic and sculpted. As the key light moves from directly in front of the face toward 90 degrees at the side, shadows deepen, contrast increases, and the mood intensifies. Think of it as a single dial. Turn it down for flattery. Turn it up for drama.
The 6 Classic Portrait Lighting Patterns
Every pattern below can be built with a single light and a modifier. The descriptions give you the key light position, the shadow signature to look for, the modifiers that work best, and the situations where each pattern earns its keep.
1. Butterfly (Paramount) Lighting
Butterfly lighting gets its name from the small, butterfly-shaped shadow that forms directly beneath the nose when the key light sits directly in front of and above the subject. It was popularized by Hollywood portrait photographers in the golden age of cinema, which is why it is also called Paramount lighting, after the studio whose glamour portraits defined the look.
Light position: Place the key light directly in front of the subject, centered with the face, and raise it to roughly 45 degrees above eye level. The higher the light, the longer the shadow under the nose. Adjust the height until that shadow is small and flattering, typically just touching the upper lip without extending below it.
Modifier: A beauty dish is the classic choice, giving semi-hard light with beautiful skin texture. A large octabox produces a softer version of the same pattern. For the full Hollywood glamour look, add a reflector or white card below the chin to fill the shadows under the chin and nose. That variation has its own name, clamshell lighting, covered below.
When to use it: Butterfly lighting is the standard for beauty, glamour, and fashion photography. The shadows beneath the cheekbones add sculpting and definition, so it is extremely flattering for subjects with well-defined cheekbones. It tends to be less flattering on round faces because the straight-on angle emphasizes the width of the face.
2. Loop Lighting
Loop lighting is named for the small, loop-shaped shadow the nose casts on the opposite cheek. It sits between butterfly lighting (light directly in front) and Rembrandt lighting (light at 45 degrees) in both angle and drama, and many professional portrait photographers consider it the most versatile and universally flattering pattern of all.
Light position: Place the key light approximately 30 to 45 degrees to one side of the subject and slightly above eye level. The shadow from the nose should angle downward and to the side, creating a small shadow on the cheek. The nose shadow and the cheek shadow must not touch or merge. If they connect, you have crossed into Rembrandt lighting.
Modifier: A medium to large softbox or octabox is ideal. The soft, gradual shadow transitions make loop lighting look natural and approachable. A shoot-through or reflective umbrella also works well and is a common choice for corporate headshots and school portraits.
When to use it: Loop lighting is the all-purpose pattern. It works on virtually every face shape and suits corporate headshots, family portraits, and general editorial work. It adds just enough dimension to keep the face from looking flat while remaining reliably flattering. When in doubt on a paid shoot, start with loop lighting.
3. Rembrandt Lighting
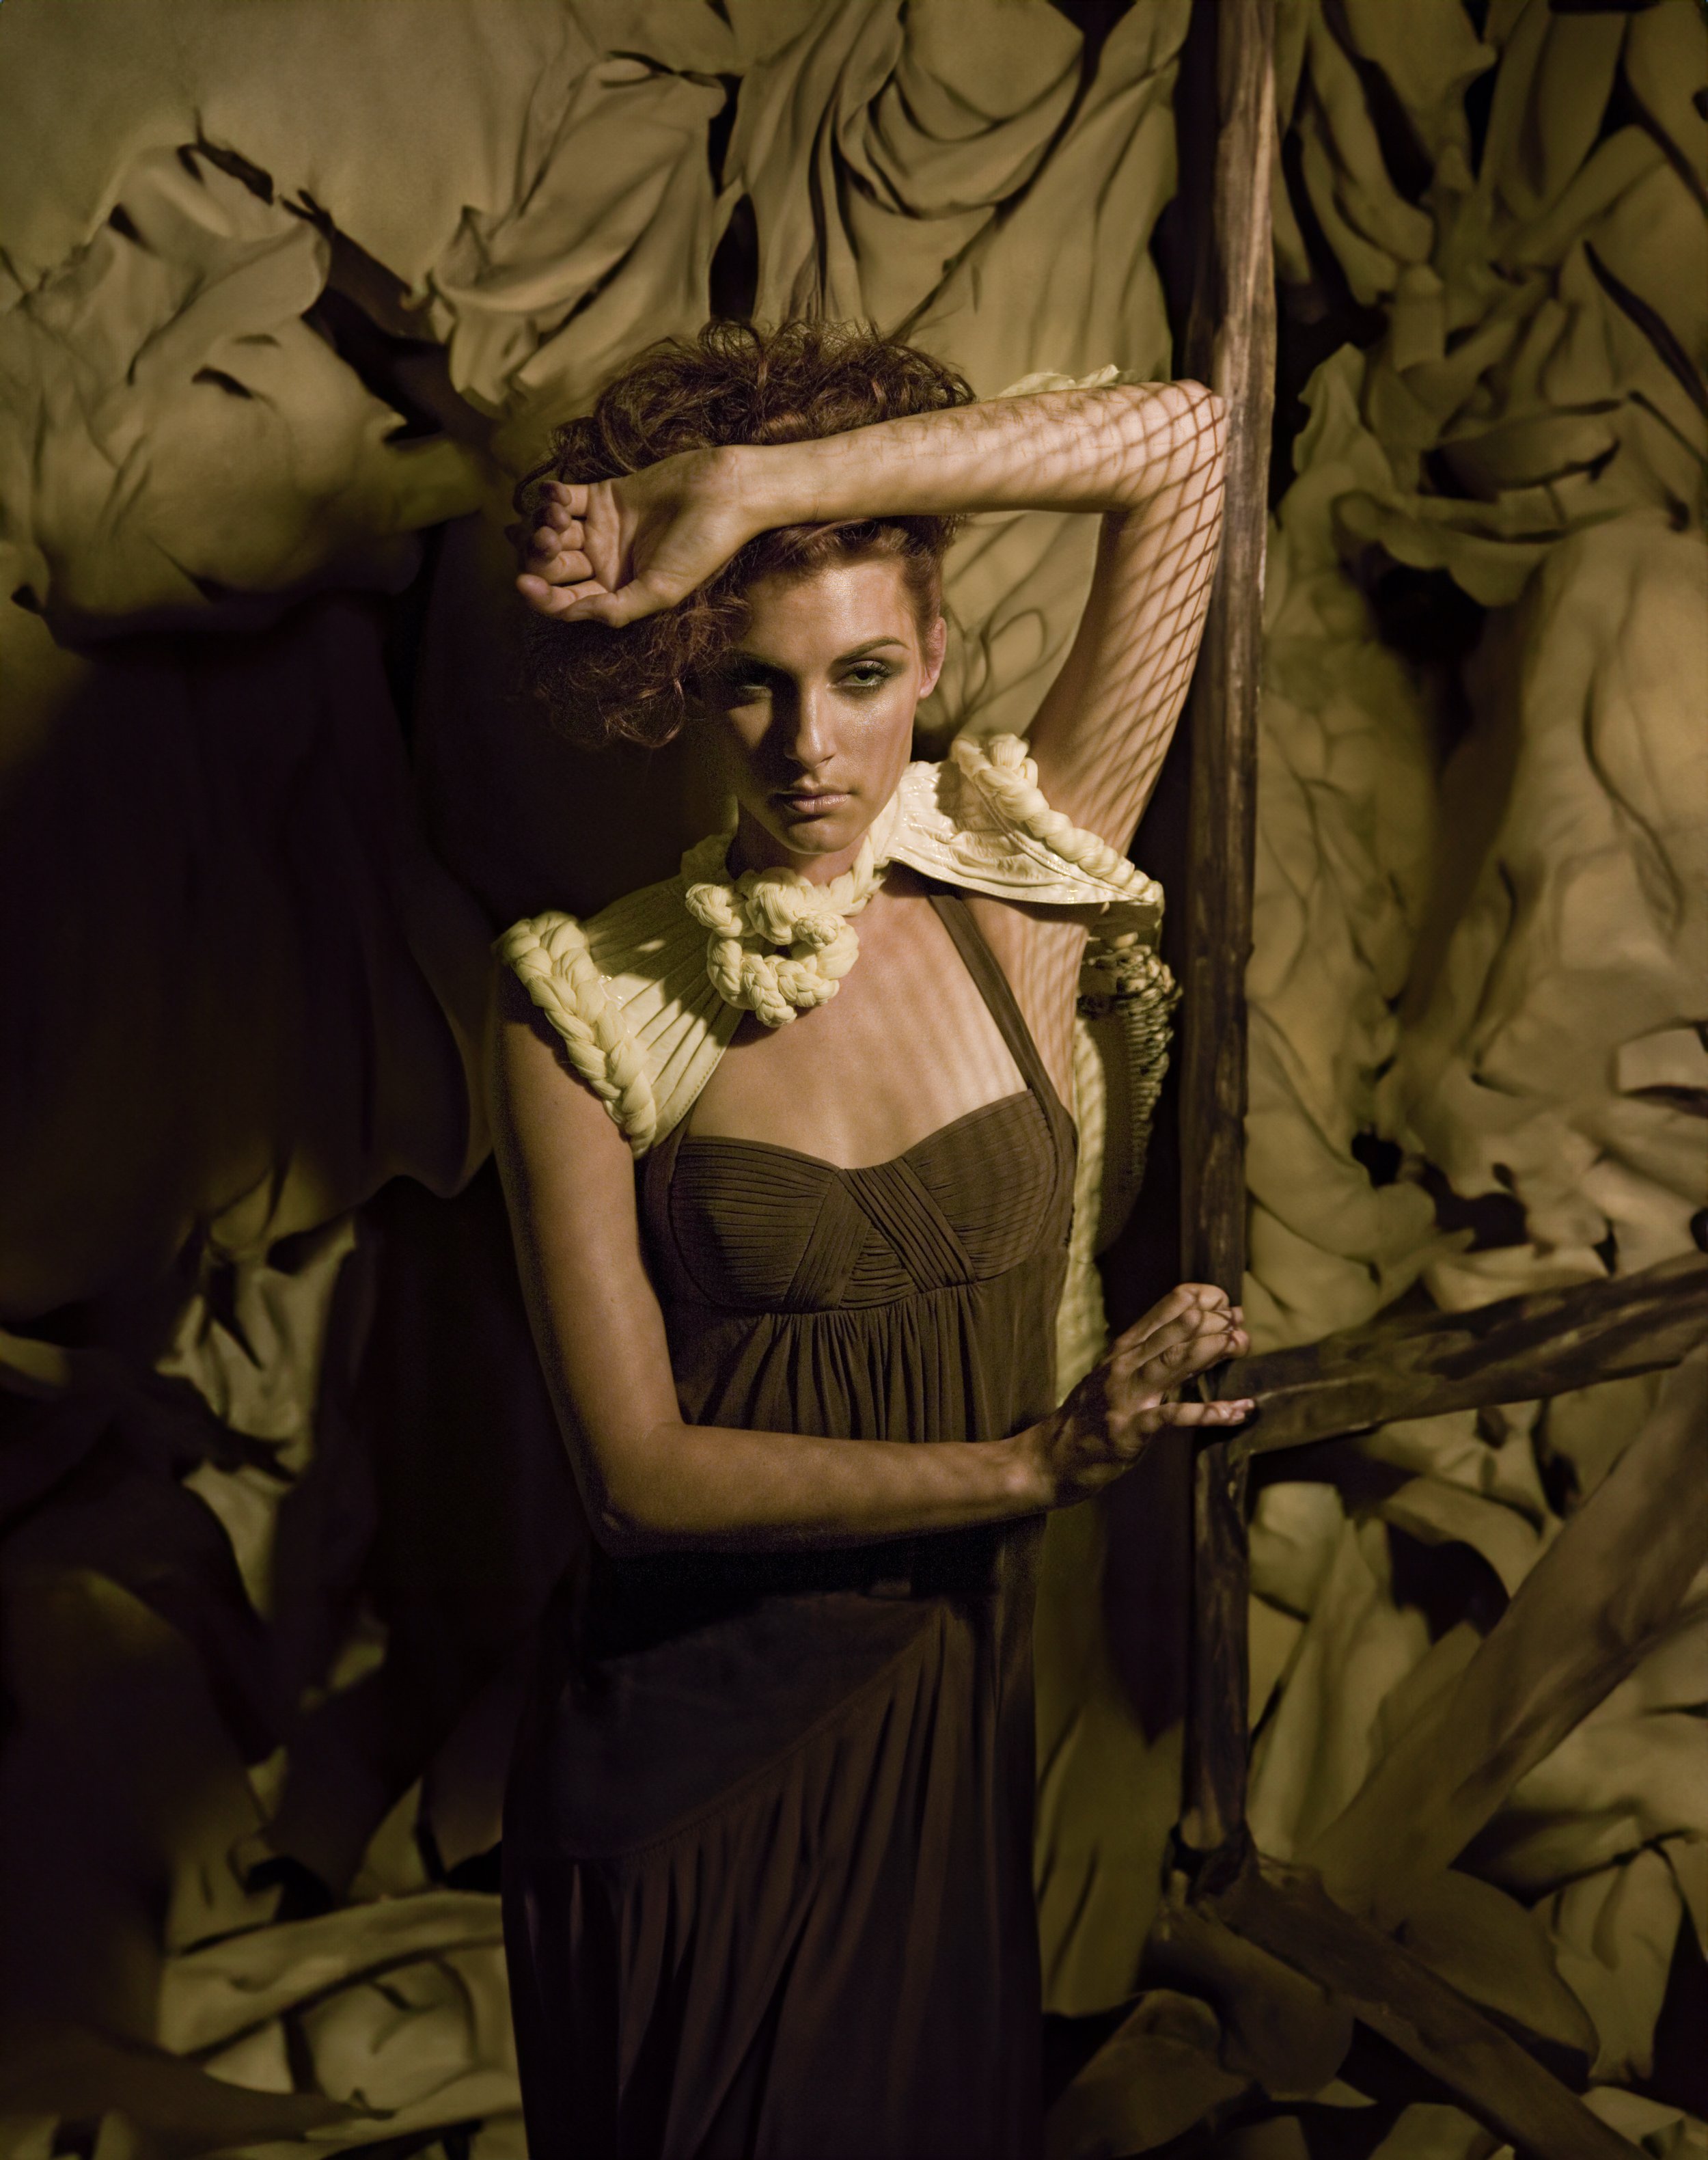
Rembrandt lighting is defined by a small triangle of light on the shadowed cheek of the subject. That triangle should be no wider than the eye and no longer than the nose. It is named after the Dutch painter who used this pattern in many of his portraits, and it remains one of the most recognizable portrait lighting patterns in photography.
Light position: Place the key light approximately 45 degrees to one side of the subject and 45 degrees above eye level. The exact position depends on the subject's facial structure. You need the light high and far enough to the side that the shadow from the nose connects with the shadow on the cheek, leaving only the small triangle of light visible below the eye on the shadow side.
Modifier: A medium softbox (2x3 ft) or octabox gives the classic look with soft shadow transitions. A beauty dish or bare strobe creates harder, more dramatic shadows. Outdoors, position the subject so the sun hits at roughly the same angle, or use a window as your key light.
When to use it: Rembrandt lighting works for nearly all face shapes and is standard for classic headshots, editorial portraits, and character-driven images. It adds dimension and drama without going as extreme as split lighting. It is particularly effective for subjects with well-defined cheekbones, and it is the pattern I reach for when a portrait needs to feel painterly and intentional. Digital Photo Mentor's free lighting patterns lesson includes clear diagrams showing exactly how the nose shadow and cheek shadow meet to form the triangle.
4. Split Lighting
Split lighting is the most dramatic of the basic patterns. The key light illuminates exactly one half of the face while the other half falls into complete shadow, with the dividing line running straight down the center of the face through the nose and chin.
Light position: Place the key light at exactly 90 degrees to the side of the subject, at face height. No light should wrap around to the shadow side. If the nose casts a shadow that extends onto the lit cheek, raise the light slightly. The goal is a clean vertical split with no triangle or loop shadow visible.
Modifier: Any modifier works, but split lighting has the most impact with a harder source. A bare strobe, small softbox, or grid spot creates crisp, defined shadows. Very large modifiers wrap light around the face and soften the split toward loop or Rembrandt territory.
When to use it: Split lighting is ideal for dramatic character portraits, film noir inspired images, musician and artist headshots, and any situation where you want a bold, edgy feel. Make sure at least one eye holds a catchlight, or the eyes will look lifeless. It can be unflattering for round faces but is very effective for angular faces and strong bone structure.
5. Broad Lighting
Broad and short lighting are not patterns in themselves. They describe which side of a turned face receives the key light, and they can be applied to loop, Rembrandt, or split patterns whenever the subject turns at an angle to the camera.
Light position: In broad lighting, the key light illuminates the side of the face turned toward the camera, which is the wider, more visible cheek. The narrower cheek falls into shadow.
When to use it: Because more of the face is illuminated, broad lighting makes the face appear wider and more open, with a bright, friendly, accessible feel. Use it for subjects with very narrow or thin faces who want a fuller appearance. Avoid it for round or wide faces, where it exaggerates width.
6. Short Lighting
Short lighting is the mirror image of broad lighting. The key light illuminates the side of the face turned away from the camera, the narrower, less visible cheek, while the wider cheek closest to the camera falls into shadow.
Light position: Same side placement as broad lighting, but the subject turns the other way, so the shadow side faces the camera. This is the more common choice in professional portraiture because most people prefer the result.
When to use it: Short lighting has a slimming effect and adds more drama and sculptural depth than broad lighting. Use it for round or wider faces and whenever you want a moody, dimensional portrait. For corporate headshots and business portraits, short lighting combined with a loop or Rembrandt pattern is the standard professional approach.
Bonus: Clamshell and Rim Light
Two more setups appear in almost every lighting tutorial, including the video below, and both are worth knowing.
Clamshell lighting combines butterfly lighting with a fill source underneath, a reflector, fill card, or second light placed below the chin and angled upward. From the side, the two sources resemble an open clamshell. The fill should sit 1 to 2 stops dimmer than the key so the face keeps some dimension instead of going flat. The result is the cleanest, most even illumination of any setup, which is why clamshell is the standard for beauty photography, cosmetic advertising, fashion editorials, and high-end headshots. It also fills in wrinkles, making it flattering for a wide range of subjects.
Rim light (also called edge light or separation light, with hair light as the specialized version for hair) sits behind the subject and aims back toward the camera, tracing a thin line of light along the edges of the hair, shoulders, or body. It is rarely used alone. Add it to any of the six patterns whenever the subject blends into a dark background or when you want extra dimension and energy. It is standard in fitness photography, dance, sports portraiture, and moody editorial setups with dark backgrounds.
How to Choose the Right Pattern: 3 Questions
With six patterns and two bonus setups in your toolkit, choosing comes down to three questions.
1. What mood do you want? Low drama and flattering: start with loop or butterfly. Moody and editorial: Rembrandt. Maximum intensity: split. Clean and polished for beauty work: clamshell.
2. What does the subject's face need? Round faces benefit from short lighting with a loop or Rembrandt pattern, because the shadow side faces the camera and slims the face. Narrow faces can use broad lighting to fill out. Strong bone structure looks great under butterfly or Rembrandt lighting.
3. What is the context? Corporate headshots favor loop lighting for its reliable flattery. Fashion and beauty work leans toward butterfly or clamshell. Gallery and editorial work can push into Rembrandt and split territory. Match the pattern to the job and you will rarely go wrong.
You Only Need One Light
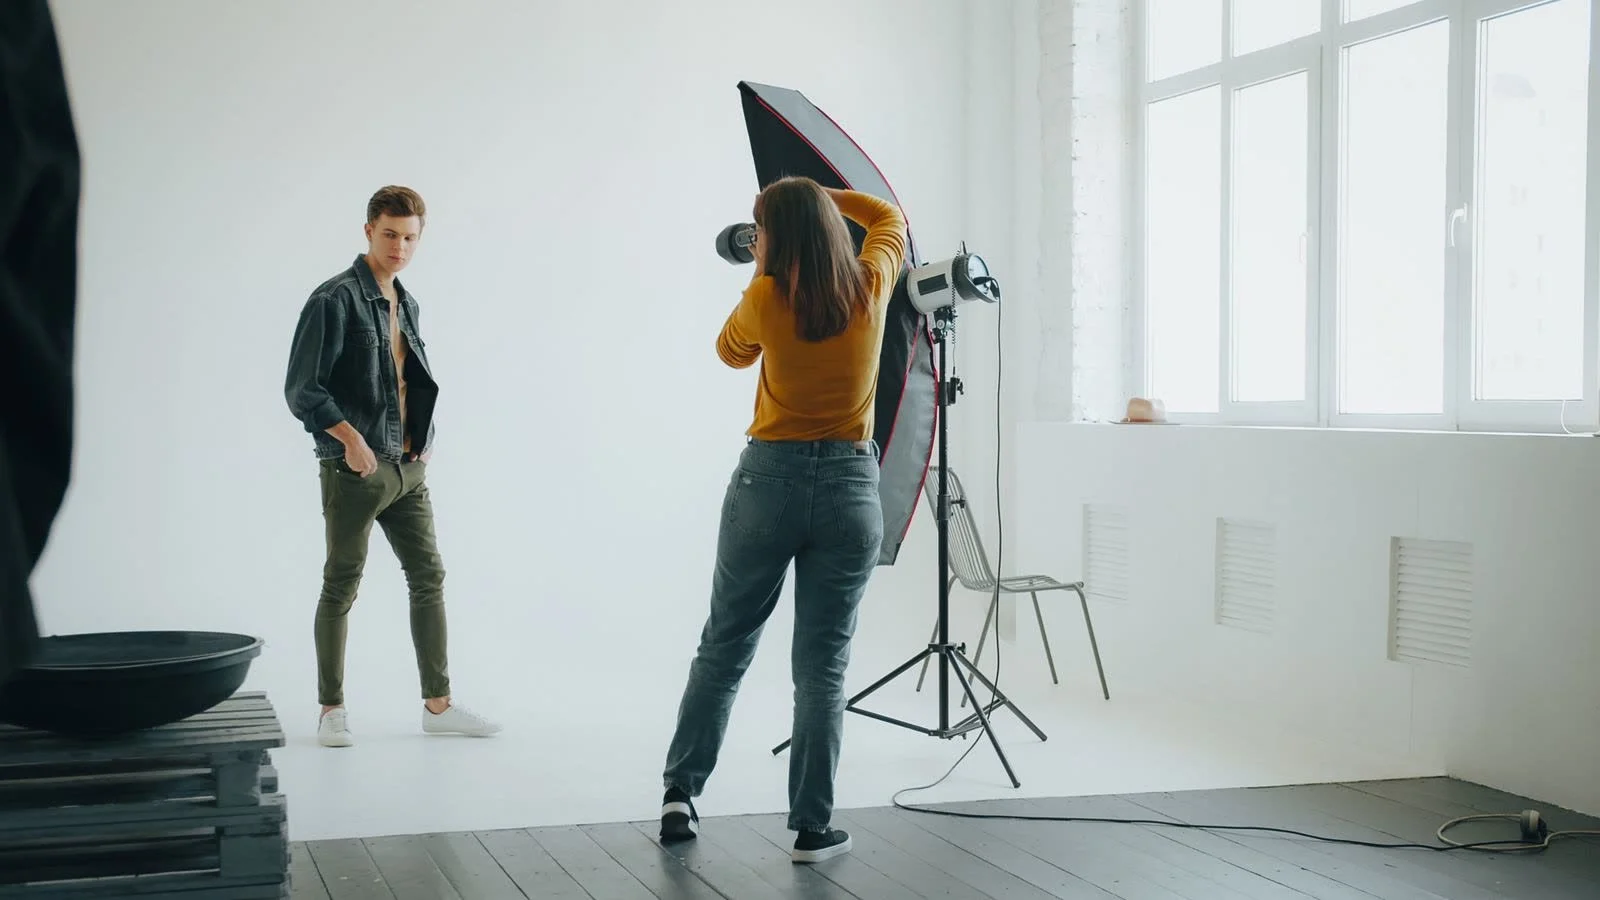
Every pattern in this guide is created by the position of a single key light. Modifiers shape the quality of the light, soft or hard, but the pattern itself is pure geometry. That means you can practice all six patterns with one strobe, one speedlight, or one window, and a $30 reflector for fill.
If you want to see how far a single light goes, my guide to a one light portrait setup walks through five complete looks from one strobe, which is the perfect hands-on companion to the patterns above. Learn to see the shadow shapes first, then add a second light only when the job actually demands it.
What 27 Years of Reading Faces Taught Me
Personal commentary by David Christopher Lee.
Lighting patterns are a vocabulary, but fluency comes from volume. Early in my career I spent four months in Miami shooting three to four models a day, nearly every day. Shooting hundreds of people in a short stretch, with almost no preparation, forced me to analyze each situation fast: the model, the location, the clothing, the hair and makeup, and then decide how I was going to light it. That period taught me more about lighting, working with different skin tones, and directing models than anything before or since. The more you practice, and the more frequently you shoot, the better you get. That is not a motivational poster. It is the entire business model of getting good.
A few years later I shot headshots for Linda Hamilton at her home in Point Dume, Malibu. She told me she only has headshots taken every ten years, so this session was going to be her image for a decade. My makeup artist started on her makeup while I set up my lights in the backyard. I had brought an Alien Bee kit with a battery pack so I never needed to plug in, and we shot three looks in about an hour. I worked her through as many angles as I could because the stakes were real. She chose five images for retouching and gave me a $2,500 tip. Preparation plus volume plus caring about the result. That is the whole formula.
Annie Leibovitz once said that in portraiture it is not the photographer's job to set the subject at ease. She can say that because she is Annie Leibovitz. For the rest of us, establishing trust and creating the right energy on set is the job. I have found that talking with subjects while hair and makeup is happening, asking about their day, doing the research on what they are working on, changes everything about the frames that follow. Light shapes the face. Trust shapes the expression.
My own defaults, after all these years: loop lighting is my workhorse on client shoots because it flatters nearly everyone and never embarrasses you. Rembrandt is my editorial choice when a portrait should feel painterly and deliberate. Butterfly belongs to beauty and fashion work, where sculpted cheekbones are the assignment. Learn all six, but earn your living on the two or three you can set up in your sleep.
Frequently Asked Questions
What is the most flattering portrait lighting pattern?
Loop lighting. It is widely considered the most versatile and universally flattering pattern because it adds dimension without harsh shadows, and it works on virtually every face shape. For beauty close-ups, clamshell lighting is the most flattering of all, since the fill from below smooths skin and minimizes shadows.
What is the difference between loop lighting and Rembrandt lighting?
It comes down to the nose shadow. In loop lighting, the nose casts a small loop-shaped shadow on the cheek that does not touch the cheek shadow. In Rembrandt lighting, the light sits further to the side and higher, so the nose shadow connects with the cheek shadow and traps a small triangle of light on the shadowed cheek. If the shadows touch, it is Rembrandt. If they stay separate, it is loop.
Which lighting pattern is best for round faces?
Short lighting combined with a loop or Rembrandt pattern. Turning the shadow side of the face toward the camera creates a slimming, sculptural effect. Avoid broad lighting and butterfly lighting for round faces, since both emphasize the width of the face.
What is butterfly lighting used for?
Beauty, glamour, and fashion photography. It was popularized by Hollywood portrait photographers in the golden age of cinema, hence the alternate name Paramount lighting. It sculpts cheekbones and flatters subjects with defined bone structure, and paired with a beauty dish it is the classic beauty setup.
What is the best lighting pattern for corporate headshots?
Loop lighting, often combined with short lighting. It is reliable, flattering, and professional without calling attention to itself. That combination is the standard approach for business portraits.
How many portrait lighting patterns are there?
Six core classics: butterfly, loop, Rembrandt, split, broad, and short. Clamshell and rim light are common additions that build on those foundations rather than replacing them.
Watch: The 9 Types of Portrait Lighting
The video below is from John Gress, a Chicago-based professional photographer and educator, and it walks through nine lighting setups with live demonstrations: split, rim, butterfly, clamshell, loop, Rembrandt, short, broad, and cross lighting. His clock-face method is worth stealing. Picture the camera at 6 o'clock facing 12, with the model in the middle, and each hour marks a light position. Split sits at 9 or 3, butterfly at 6, loop at 5 or 7, Rembrandt at 4 or 8, and rim at 12 behind the subject. Watch it once, then set up one light and find each pattern yourself. That single exercise will teach you more than any article.

Video: "The 9 types of portrait lighting photographers need to know-whether they're on location or in studio" by John Gress
The six patterns in this article and the nine setups in the video describe the same physics. Lighting patterns are not studio-only knowledge, either. They describe how shadows fall on a face, which means they apply to window light, open shade, and golden hour just as much as to strobes. Once you can name the pattern you are seeing, you can build it anywhere.
Book a Portrait Session
If you need portraits that use light deliberately instead of accidentally, I would like to hear about your project. I shoot headshots, editorial portraits, and celebrity and fashion portraiture in Los Angeles, and every session starts with the right lighting pattern for your face and your goals. Get in touch about your portrait session. You can also see how directing and lighting work together in my posing guide for non-models, which pairs naturally with everything above.
About the author: David Christopher Lee is a Los Angeles portrait photographer with 27 years of experience shooting celebrities, fashion, and editorial portraits. View the portfolio. Get in touch.
Which lighting pattern do you reach for first on a shoot, and why? Leave a comment below.