A portrait photography workflow is the complete system that carries a client from the first inquiry to the final gallery delivery. It covers how fast you answer, how you run the consultation, what the contract says, how you prepare, how you behave on shoot day, and how you back up, cull, edit, and deliver the images. Most photographers think the job is the two hours with the camera. After 27 years shooting portraits, I can tell you the job is the other 98 percent. The workflow is what clients actually remember, and it is what turns one session into the next five.
In this guide:
- What Is a Portrait Photography Workflow?
- Why the Workflow Is the Real Product
- The 9-Step Portrait Photography Workflow
- Step 1: Answer the Inquiry Fast
- Step 2: Run a Real Consultation
- Step 3: Contract and Deposit
- Step 4: Pre-Session Preparation
- Step 5: Shoot Day
- Step 6: Back Up, Then Cull
- Step 7: Edit for Consistency
- Step 8: Deliver the Gallery
- Step 9: Follow Up and Earn the Referral
- My Portrait Session Workflow After 27 Years
- Frequently Asked Questions
- Watch: Photography Client Workflow
What Is a Portrait Photography Workflow?
A portrait photography workflow is the repeatable sequence of steps a photographer follows for every client session, from the moment an inquiry arrives to the moment the final gallery is delivered and archived. It has two halves. The front half is client facing: inquiry response, consultation, booking, preparation, and the session itself. The back half is invisible to the client: backup, culling, editing, delivery, and follow up.
Beginners treat each session as a fresh improvisation. Professionals run a system. The system exists for three reasons. First, it protects quality: nothing gets forgotten when the process is written down. Second, it protects the business: contracts, deposits, and timelines are handled the same way every time. Third, and most important, it shapes how the client feels. As photographer Maegan Grendall puts it in the video below, what makes a photography experience unforgettable is not just beautiful images. It is how clients feel from the very first inquiry to the final gallery delivery. The workflow is the experience.
Why the Workflow Is the Real Product
Clients cannot judge your RAW files. They judge your responsiveness, your clarity, your calm on set, and how quickly the gallery arrives. Two photographers can deliver equally good portraits, and the one with the better workflow gets the referral every time. Grendall built her portrait and wedding business on exactly this: a thoughtful client workflow and intentional touch points that created a business fueled by referrals and repeat clients. That is not marketing language. It is the economics of portrait photography.
A strong workflow also saves the photographer. Without a system, every session leaks time: the inquiry you answered three days late, the client who arrived unprepared because nobody sent a prep guide, the cards you forgot to back up before culling, the gallery that took six weeks because editing had no deadline. Systems turn chaos into a checklist. And on a real set, chaos is always waiting. Creative energy can lead to chaos, so controlling it with a good team and clear guidance is the photographer's job. The workflow is how you do that before the chaos starts.
The 9-Step Portrait Photography Workflow
Here is the full sequence, in order. Every step feeds the next one.
Step 1: Answer the Inquiry Fast
Speed is the first impression. When someone inquires about a portrait session, they are usually contacting two or three photographers at once. The photographer who replies within hours, with warmth and a clear next step, wins a disproportionate share of those inquiries. Your reply should do three things: thank them, ask two or three qualifying questions (what kind of session, when, where), and propose the consultation. Keep templates for this so the reply takes five minutes, not fifty. A fast, personal response signals that you will be just as responsive with everything that follows, and clients notice.
Step 2: Run a Real Consultation
The consultation is where sessions are won or lost. This is a conversation, not a price list. Ask what the portraits are for, who they are for, and what feeling they want. Then manage expectations explicitly. My rule, learned over 27 years and stated plainly in my book: when dealing with a client, it is all about managing expectations. Under promise and over deliver. If you promise a two week turnaround and deliver in ten days, you are a hero. If you promise one week and deliver in ten days, you are a disappointment, with the same ten days of work. Never say you can do too much for them. High expectations are the hardest relationships to maintain, and the consultation is where you set them at a level you can beat. For the pricing side of this conversation, my guide on how to raise photography prices for 2027 covers how working photographers frame value without racing to the bottom.
Step 3: Contract and Deposit
No session is booked until there is a signed contract and a paid deposit. This is the step beginners skip and later regret. The contract should spell out the deliverables, the timeline, the payment terms, usage rights, and the cancellation policy. When something goes wrong later, and something eventually will, the contract is what both sides look at. My own policy, also from the book: if a problem is my fault, I take responsibility and fix it, up to and including reshooting at no charge. If the client is wrong, I show them the initial contract and point to what was agreed. That only works if the contract exists and is specific. A deposit, typically 30 to 50 percent, commits both sides. It filters out the casually curious and protects your calendar.
Step 4: Pre-Session Preparation
Preparation is the invisible half of a great session. A few days before the shoot, confirm the time, location, and wardrobe. Send a short prep guide: what to wear, what to avoid, when to arrive, what to bring. If you are photographing someone with a public profile, do your research. Before I shoot a celebrity, I research what projects they are working on. They genuinely appreciate it, and it changes the conversation on set. Then prepare the technical side: scout the location or arrive early, charge every battery, format every card, and pack backups for the backups. Plan your lighting in advance. If you know you will be working with a single strobe, my one light portrait setup guide gives you five complete looks from one light, and the portrait lighting patterns guide covers which pattern suits which face. Walking in with the light already decided is the difference between a smooth session and an hour of fiddling while the client watches.
Step 5: Shoot Day
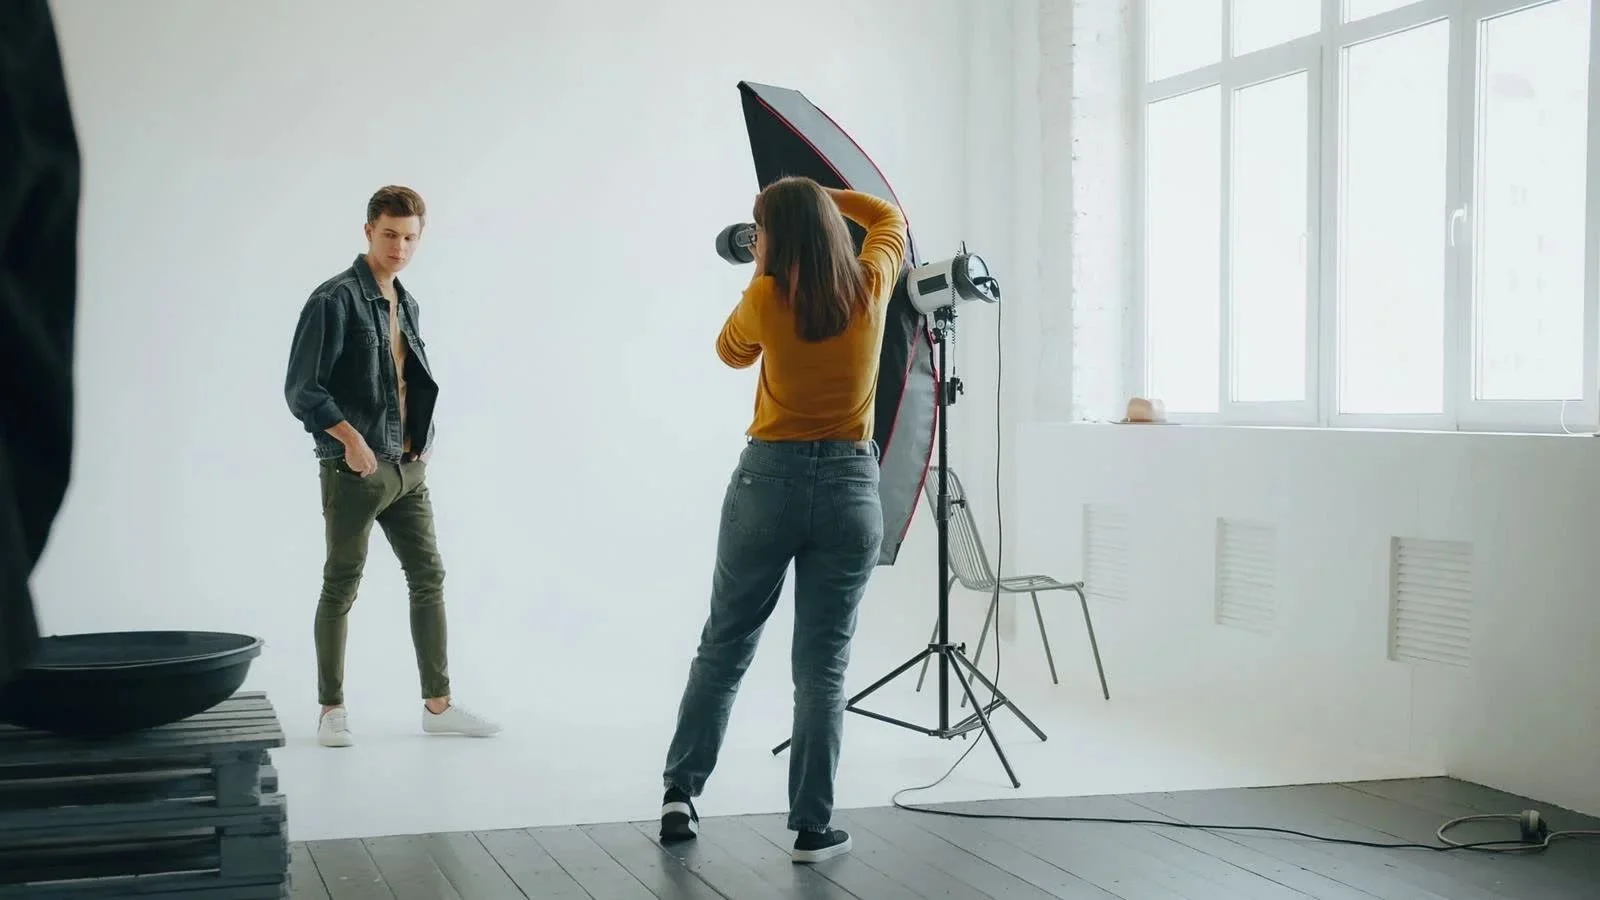
On shoot day, your job is to be the calmest person in the room. Arrive early. Greet the client by name. Keep the energy warm and unhurried, even when you are moving fast. Direct with confidence: most clients are not models, and they are waiting for you to tell them what to do. My posing guide for people who are not models is the full version of my directing system, but the short version is this: give constant, specific, encouraging direction, and keep shooting through the in-between moments. Watch the clock without watching it visibly. Be ready for the session to run short or long. People with tight schedules may give you twenty minutes; others may want to keep going. My book's rule: be prepared for not having enough time, and be prepared for more time. Keep them happy either way. And shoot with redundancy: two card slots when the camera offers them, because a corrupted card on a paid session is a career event.
Step 6: Back Up, Then Cull
The moment you are back at your desk, back up before you do anything else. The professional standard is the 3-2-1 approach in spirit: the working files plus at least two separate copies before you ever scroll through thumbnails. As the Aftershoot candid portrait guide puts it: first rule, back up before you even think about scrolling through thumbnails. Two drives minimum, no exceptions. Only then do you cull. Run a two pass system: a fast first pass that kills the obvious rejects (blinks, misfocus, duplicates), then a slower storytelling pass that selects the final set. A typical portrait session produces hundreds of frames; the cull is where the gallery gets its shape. I wrote a full breakdown of the modern approach in how to cull photos fast, including the AI-assisted system that cut my own culling time dramatically.
Step 7: Edit for Consistency
Edit the selects as a set, not as individual images. The gallery has to feel cohesive: consistent exposure, white balance, and color grading from the first frame to the last, even when the light changed three times during the session. Build this on a base preset or profile that matches your style, then adjust per image. Keep retouching restrained. The current industry standard, and my own practice, is refinement without reinvention: clean up distractions, even out skin gently, and leave the person looking like themselves on their best day. This stage used to be the great time sink of portrait photography. It still rewards craft, but the baseline has shifted: Imagen's published workflow data reports a typical 300-image portrait session takes 5 to 8 hours of manual culling and editing versus 20 to 30 minutes with an AI-trained personal profile, with photographers reporting up to 96 percent time savings. Use whatever leverage exists. The hours you save here are hours you can spend shooting or with clients.
Step 8: Deliver the Gallery
Deliver through a clean, branded online gallery, not a file sharing link. The delivery is part of the brand: password protection, organized collections, clear download permissions, and a presentation that feels considered. Set the delivery timeline in the contract and hit it. Industry expectations vary by session type. Aftershoot's delivery data notes that family portrait clients typically see their full gallery in about two to four weeks, and the faster clients relive the session, the stronger the word of mouth. Consider sending a small set of sneak peeks within 24 hours. It is not standard practice everywhere, but riding the fresh-session excitement straight into social shares and client delight is one of the highest-return habits in this business. Announce the delivery personally with a short message, not just an automated link. That message is the emotional peak of the whole workflow. Make it feel like one.
Step 9: Follow Up and Earn the Referral
The workflow does not end at delivery. A week after the gallery lands, check in: ask how they liked the images, whether they need help with prints, and whether anything needs adjusting. Small problems caught in this window stay small. Then make the referral ask natural, not awkward. The clients who just told you they love their portraits are the ones most likely to send their friends. A simple line works: if you know anyone who needs portraits, I would love an introduction. Grendall's whole thesis is that this is where the business compounds. Systems and communication create the experience, the experience creates the referral, and the referral creates the next session. Photographers who treat delivery as the finish line leave their cheapest marketing on the table.
My Portrait Session Workflow After 27 Years
Personal commentary by David Christopher Lee.
Everything above is the system. Here is what 27 years of running it taught me, in my own words.
First, the sentence I put in my book because I needed to read it myself: when dealing with a client, it is all about managing expectations. Under promise and over deliver. I have watched photographers lose good clients over gaps of a few days, not because the work was late in any absolute sense, but because the promise was careless. Promise less than you can do, then do more than you promised. It is the cheapest reputation insurance in photography.
Second, control the chaos before it starts. A portrait session has a dozen moving parts: the client, the light, the location, the schedule, the wardrobe, the energy in the room. Creative energy can lead to chaos, so it is your job to control it with a good team and clear guidance on the overall vision. That is a line from my book, and it is the entire reason the workflow exists. The checklist, the prep guide, the scouted location, the charged batteries. None of that is glamorous. All of it is the job.
Third, do the homework on the human being. Before I photograph a celebrity, I research what they are working on. They notice, and they appreciate it. It works exactly the same with a non-famous client. Know what the portraits are for. Know their name, their story, what they are nervous about. Preparation is respect, and respect relaxes people faster than any posing trick.
Fourth, be ready for anything with the clock. Early in my career I shot four months in Miami, three to four models a day, almost no preparation, and it taught me to think fast: the model, the location, the clothing, the hair and makeup, then decide how to light it in minutes. Years later I shot headshots for Linda Hamilton at her home in Point Dume. She told me she only has headshots taken every ten years, so those frames were her image for a decade. I brought an Alien Bee kit with a battery pack, set up in her backyard while makeup was happening, and shot three looks in about an hour. Same photographer, opposite tempos. My book's rule covers both: be prepared for not having enough time, and be prepared for more time. You need to be fast with your lighting and cameras in case they need to leave, and ready to keep going if they want to stay. It is all about keeping them happy.
Fifth, when it goes wrong, own it fast. My book lays out the process: stay calm, listen, reply in writing immediately, figure out what happened, then offer a solution. If it was my fault, I take responsibility and fix it, including reshooting at no charge. If the client is wrong, I show them the initial contract. And sometimes the right move is to walk away and refund the money, because reputation is everything and some people will never be happy. Every photographer should decide these policies before they need them, not during.
The through line of 27 years is unglamorous: answer fast, promise carefully, prepare thoroughly, stay calm, back up everything, deliver on time, and follow up. Do that for every session and the workflow stops being a checklist. It becomes the reason people hire you twice.
Frequently Asked Questions
What is a photography workflow?
A photography workflow is the repeatable system a photographer follows for every job, covering both the client-facing steps (inquiry, consultation, booking, preparation, the shoot) and the post-production steps (backup, culling, editing, delivery, archiving, follow-up). It exists so quality stays consistent and nothing gets forgotten when the schedule gets busy.
How long does it take to get portrait photos back?
It depends on the session type and the photographer's schedule. Published industry data notes that family portrait clients typically receive their full gallery in about two to four weeks. What matters more than the exact number is that the timeline is stated in the contract before the session and then met. A photographer who promises three weeks and delivers in two earns more trust than one who promises one week and delivers in two.
How do photographers deliver photos to clients?
Through a branded online gallery with password protection and controlled download permissions, not through generic file-sharing links. A professional gallery lets clients view, favorite, share, and order prints from one polished presentation. The delivery usually arrives with a personal message announcing it, and many photographers send a few sneak-peek images within the first day to keep the excitement high.
Do professional photographers send sneak peeks?
Many do, though it is not universal standard practice. Sending a small set of edited highlights within 24 hours of the session rides the client's fresh excitement and often generates immediate social shares and referrals. If you offer sneak peeks, state it in the consultation so clients expect them rather than assuming the full gallery is ready.
What should a portrait photography contract include?
At minimum: the deliverables (session length, number of edited images, what is included), the delivery timeline, the payment terms and deposit, the cancellation and rescheduling policy, and the usage rights for both sides. The contract is the document both parties look at when something goes wrong, so specificity is what makes it protective.
Watch: Photography Client Workflow
The video below is from Rachel Traxler's That Photography Girl channel, featuring portrait and wedding photographer Maegan Grendall. It walks through the client workflow that built her referral-driven business: why the client experience starts long before the session, the workflow steps that make clients feel confident and cared for, how clear communication prevents headaches, and why she considers contracts one of the most important parts of the system. Her core point matches everything above: it is not just beautiful images. It is how clients feel from the first inquiry to the final gallery delivery. Watch it once, then audit your own workflow against it. The gaps you find are your next upgrades.
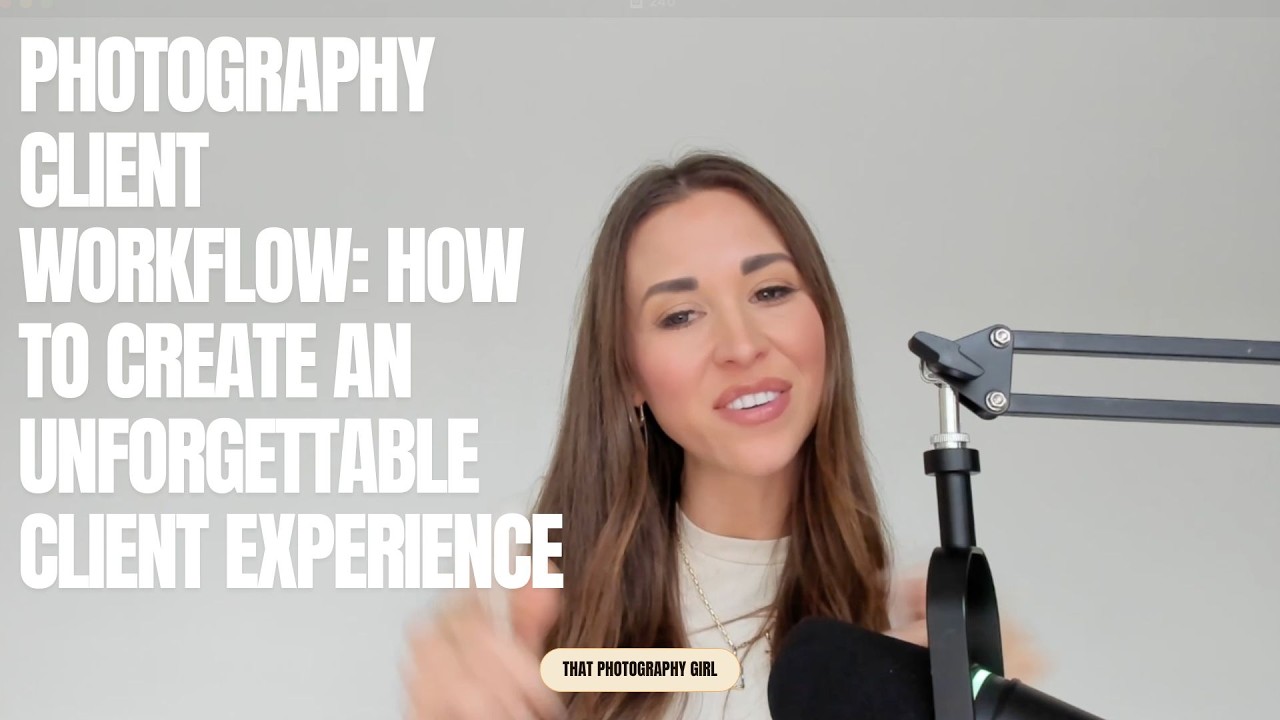
Video: "Photography Client Workflow: How to Create an Unforgettable Client Experience" with Maegan Grendall (watch on YouTube)
The nine steps in this article and the systems in the video describe the same principle from two angles. The article gives you the sequence. The video gives you the client psychology behind it. Put them together and you have a portrait photography workflow that does what a workflow is supposed to do: make every session feel effortless to the client and repeatable for you.
Book a Portrait Session
If you want portraits backed by a real workflow, not just a camera, I would like to hear about your project. I shoot headshots, editorial portraits, and celebrity and fashion portraiture in Los Angeles, and every session runs on the system above: fast communication, a real consultation, thorough preparation, a calm shoot day, and on-time gallery delivery. Get in touch about your portrait session. You can also view the portfolio to see the results this process produces.
About the author: David Christopher Lee is a Los Angeles portrait photographer with 27 years of experience shooting celebrities, fashion, and editorial portraits. View the portfolio. Get in touch.
What is the weakest step in your current portrait workflow: the front half with clients, or the back half after the shoot? Leave a comment below.