Ask ten photographers for the best camera settings for portraits and you will get eleven answers. Ask me, and I will give you something better: the exact settings framework I have used across 27 years of shooting celebrities, executives, and families, from dark nightclubs to beach sunsets. Camera settings for portraits are not magic numbers. They are a decision order: aperture tells the story, shutter speed protects sharpness, and ISO covers the gap. Get that order right and your portraits stop being accidents. In this guide you will get the short-answer recipe, the full exposure-triangle breakdown, six real-world setting recipes for the situations you actually shoot, and a video from a working pro on how aperture priority beats manual mode on most shooting days.
In this guide:
- The short answer: my portrait settings recipe
- Aperture for portraits
- Shutter speed for portraits
- ISO for portraits
- Camera mode: aperture priority vs manual
- The 6 portrait settings recipes
- Camera settings beyond exposure: focus and white balance
- Watch: how the pros actually set their cameras
- My settings rules after 27 years behind the camera
- Frequently asked questions
The Short Answer: My Portrait Settings Recipe
If you only read one section, make it this one. For natural-light portraits of a single person, start here: Aperture Priority mode, aperture f/2 to f/2.8, Auto ISO with a ceiling you trust, Eye AF on, and a minimum shutter speed of 1/200s. That combination gives you the creamy background blur clients associate with professional portraits, protects you from motion blur, and lets you think about the person instead of the dials. Shoot a group or an environmental portrait with context? Stop down to f/4 or f/5.6 so everyone stays sharp. Working in a studio with strobes? Switch to Manual, ISO 100, aperture f/8, shutter at your flash sync speed (usually 1/160s or 1/200s), and control exposure with the lights. The rest of this guide explains why each of those choices works, so you can break the rules on purpose instead of by accident.
Aperture for Portraits: The Storytelling Setting
Aperture is the first decision because it shapes what the portrait feels like. A wide aperture like f/1.8 melts the background into bokeh and pulls every eye to the subject's face. It is the classic portrait look for a reason: it hides messy locations, flatters skin by softening background detail, and gives that expensive, cinematic separation. For headshots and half-body portraits, f/1.8 to f/2.8 is the sweet spot where subject isolation meets keepers.
Wide Open for Singles: f/1.8 to f/2.8
At f/1.8, depth of field is razor thin. That is a feature and a warning. Your subject pops like nothing else, but your focus has to land on the near eye or the shot fails. I shoot most of my natural-light singles between f/2 and f/2.8, because f/2 gives me the blur I want with a margin for the tiny focus shifts that happen when a real person breathes, laughs, or leans in. Photography Icon's portrait settings guide lands in the same place, recommending f/1.4 to f/2.8 for subject separation with single-point autofocus locked on the nearest eye.
Groups and Environmental Portraits: f/4 to f/5.6
The moment there is more than one face, or the location is part of the story, stop down. Two people standing at slightly different distances will not both be sharp at f/1.8, and an environmental portrait of a chef in her kitchen loses its point if the kitchen is soup. For couples and small groups, f/4 to f/5.6 keeps everyone sharp while holding enough softness to look professional. For full storytelling scenes, f/5.6 to f/8 brings the environment in.
When I Stop Down on Purpose
Sharpness is not always the goal of wide aperture. In my headshot work, I often land around f/4 even when I own f/1.4 glass, because a headshot client needs both eyes and the tip of the nose sharp, and no client has ever complained that the background was too soft at f/4. For more on the headshot-specific version of these decisions, see my headshot photography tips guide.
Shutter Speed for Portraits: The Sharpness Insurance
Shutter speed has one job in portraiture: freeze the tiny, constant motion of being a person. Head turns, hand gestures, laughter, kids being kids. The rule I teach every assistant: 1/200s or faster for handheld portraits, 1/125s as the absolute floor if your subject is perfectly still and your hands are steady.
The Focal-Length Rule
A classic guideline still holds: keep your shutter speed at least as fast as your focal length. Shooting an 85mm lens? Stay at 1/100s or faster, and honestly, stay at 1/200s. Longer lenses magnify your handshake exactly the way they magnify the subject. With image stabilization you can cheat a stop or two on camera shake, but stabilization does nothing for a subject who moves, so treat IBIS as a bonus, not a plan.
Kids, Candids, and Motion: 1/250s and Up
Photographing children, events, or anything candid? Move to 1/250s or 1/500s. A toddler mid-laugh at 1/125s is a memory, not a portrait. When motion is the point, hair blowing or a dress mid-twirl, 1/500s freezes the gesture while keeping the energy.
Flash Sync Speed in the Studio
Add strobes and shutter speed stops being about motion and starts being about the flash. Your shutter must stay at or below your camera's sync speed, usually 1/160s or 1/200s, or you get a black band across the frame. In the studio I set 1/160s, lock it, and forget it. The strobe freezes the subject, so motion blur is a non-issue.
ISO for Portraits: The Lever You Stop Fearing
ISO is the setting beginners treat like a sin and pros treat like a tool. Modern sensors handle ISO 800 to 1600 beautifully, and a slightly grainy portrait always beats a slightly blurry one. Blur cannot be fixed in post. Noise can be reduced without hurting skin.
Auto ISO Done Right
Auto ISO is the single most useful portrait setting most photographers refuse to use. Set it up properly: enable Auto ISO, set a maximum you trust (ISO 6400 is safe on most modern bodies), and set a minimum shutter speed (1/200s for portraits). Then shoot Aperture Priority and let the camera float ISO to protect your shutter speed. You control the story with aperture; the camera protects the sharpness. This is the exact setup recommended in current 2026 beginner guides, and it is the setup I hand to second shooters.
How High Is Too High?
Outdoors in daylight, ISO 100 to 400. Indoors by window light, 400 to 800. After sunset or in dim venues, 1600 to 3200 without apology. I will take ISO 3200 grain over a missed moment every time. The ceiling depends on your body and your delivery size, an 8x10 print forgives far more than a billboard, so test your own camera once and write down your personal limit.
Grain Beats Blur, Every Time
Say it until it is instinct: a noisy sharp frame is a photograph; a clean blurry frame is a delete. When light drops, raise ISO before you drop shutter speed. Your clients will never ask about noise. They will absolutely notice soft eyes.
Camera Mode: Aperture Priority vs Manual
Here is the argument that starts fights in camera clubs. Manual mode is not more professional. It is more appropriate for stable light. Curtis Padley's video below makes the case better than I can: working pros shoot Aperture Priority most of the time because real portraits happen in changing light, and exposure compensation fixes the meter's mistakes faster than spinning three dials.
Why Aperture Priority Wins Most Shooting Days
Outdoor sessions, events, weddings, anything where clouds move and subjects walk between shade and sun: Aperture Priority with Auto ISO and exposure compensation on a back dial. You set the depth of field, you ride exposure comp plus or minus a stop as the meter gets fooled by bright skies or dark suits, and you never miss a moment to the settings. The camera does arithmetic; you do photography.
When Manual Earns Its Place
Manual is the right tool when the light stops changing: studio strobes, consistent indoor setups, night scenes on a tripod. In the studio I want identical exposure on frame 1 and frame 400 so the whole gallery matches, and only Manual gives me that. The rule is simple: changing light, Aperture Priority. Stable light, Manual.
The 6 Portrait Settings Recipes
Recipes, not rules. Start here and adjust to your light.
1. Outdoor daylight portrait. Aperture Priority, f/2.8, Auto ISO capped at 1600, minimum shutter 1/250s, Eye AF. Harsh midday sun? Find open shade first, the recipe stays the same, the light does the work. For the lighting side of outdoor sessions, my portrait lighting patterns guide covers what to do with the sun once your settings are set.
2. Golden hour portrait. Aperture Priority, f/1.8 to f/2.8, ISO 100 to 400, shutter 1/200s to 1/500s, white balance on Daylight or Cloudy, never Auto, so the camera does not neutralize the warmth. Backlit subjects need plus exposure compensation or spot metering on the face. My golden hour portrait photography guide goes deep on the light itself.
3. Overcast day portrait. Aperture Priority, f/2.8 to f/4, ISO 100 to 400, shutter 1/125s minimum. Clouds are a giant softbox. This is the easiest flattering light in existence, and the settings barely matter, which is exactly why beginners should shoot more cloudy-day portraits.
4. Indoor window-light portrait. Aperture Priority, f/2 to f/2.8, ISO 400 to 800, shutter 1/125s minimum, white balance matched to the room. Place the subject at a 45-degree angle to the window, expose for the skin, and let the background fall dark. My portrait photography workflow covers how this session type flows from inquiry to gallery.
5. Studio strobe portrait. Manual mode, ISO 100, f/8, 1/160s, white balance on Flash. Set the aperture for the depth of field you want, then bring the strobe power up or down until the exposure is right. The settings never change during the session; only the lights do.
6. Nightclub and event portrait. Manual mode, f/2.8, 1/125s, ISO 1600 to 3200, on-camera or off-camera flash for the subject, and let the ambient lights paint the background. Dragging the shutter slightly below sync speed pulls in the color of the room while the flash freezes the face. This is the recipe from my nightclub photography lighting guide, born the night I photographed Lady Gaga in a dark club in 2007 and learned that grain plus a sharp face beats a clean blur every time.
Camera Settings Beyond Exposure: Focus and White Balance
Settings are not only exposure. Two more dials decide whether portraits look professional.
Eye AF and Single-Point Focus
Modern Eye AF is the closest thing to a cheat code in portraiture: it locks onto the subject's eye and tracks it. Use it whenever your camera offers it, with continuous AF for anything that moves. On older bodies, single-point AF placed on the near eye is the discipline that built careers. Either way, zoom in and check focus on the first few frames. Nothing is worse than discovering at home that the nose is sharp and the eyes are soft.
White Balance for Skin Tones
Auto white balance is fine until it is not: mixed indoor light, golden hour, and stage lighting all confuse it, and inconsistent skin tones across a gallery look amateur. For daylight, 5200K to 5600K. For golden hour, set it manually around 4500K to 5000K to protect the warmth. For tungsten interiors, 3000K to 3800K. Shoot RAW and you can fix mistakes later, but consistent in-camera white balance saves hours and makes your galleries look deliberate.
Watch: How the Pros Actually Set Their Cameras
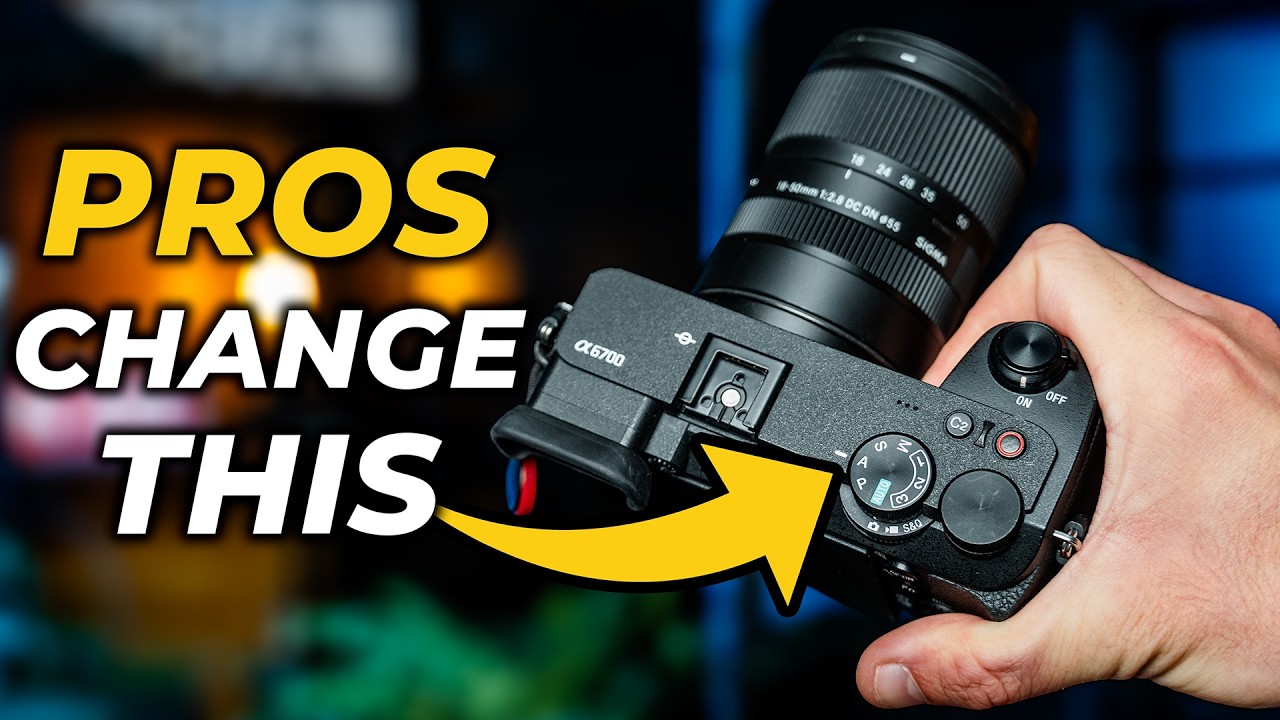
Photographer and educator Curtis Padley argues that working pros mostly skip Manual mode and shoot Aperture Priority, and he walks through exactly why. In his own words and demonstrations, the video breaks down ISO as your brightness lever, shutter speed's double duty controlling both exposure and motion, and aperture's double duty controlling exposure and depth of field. The two ideas worth stealing: first, set Auto ISO with a ceiling and a minimum shutter speed so the camera protects sharpness while you control the story with aperture; second, use exposure compensation to correct the meter in seconds instead of rebuilding your exposure by hand every time the light changes. Manual mode, he argues, is for stable light, not for proving you are a serious photographer. Watch it once and your settings anxiety drops by half.
My Settings Rules After 27 Years Behind the Camera
I have photographed more than 300 celebrities, and I can tell you the dirty secret of camera settings: the pros are not doing anything exotic. We are doing the simple things identically, every time. When I shot Lady Gaga in a packed nightclub in 2007, there was no time to be clever. The room was dark, the lights were red and blue, and the moment would not wait. I locked a fast-enough shutter, opened up, pushed the ISO without guilt, and let the flash freeze her face while the room blurred into color. Grainy? A little. Sharp where it counted? Completely. That night permanently rewired my priorities: sharpness first, noise never.
On location headshot sessions, the opposite discipline applies. I remember a beach shoot with Linda Hamilton at Point Dume, battery-powered strobes, wind coming off the water, three looks to get through. The settings never moved the whole afternoon. Same aperture, same shutter, same ISO. When the camera is a constant, every frame matches, the client sees consistency, and I can spend my attention on the person instead of the histogram. That is what settings discipline buys you: not better numbers, but a quiet camera and a present photographer.
The Miami years taught me the same lesson at volume. Months of shooting three or four models a day for editorial clients leaves no room for fiddling. You build one baseline that works, you verify it on the first frames, and then you stop touching dials and start directing people. Beginners chase the perfect settings for each frame. Professionals pick good settings and keep them. Be the professional: decide your aperture for the story, guarantee your shutter for sharpness, let ISO do the floating, and go make the person in front of you feel like the only person in the world. That is the whole job, and no setting replaces it.
Frequently Asked Questions
What is the best camera setting for portrait photography?
Aperture Priority mode with a wide aperture of f/1.8 to f/2.8, Auto ISO with a sensible ceiling, Eye AF, and a minimum shutter speed of 1/200s. It gives you background blur, sharp eyes, and the freedom to focus on your subject while the camera handles exposure.
Should I shoot portraits in manual or aperture priority?
Aperture Priority for changing light: outdoors, events, weddings. Manual for stable light: studio strobes, consistent interiors. Manual is not more professional; it is more appropriate when the light stops moving.
What shutter speed is best for portraits?
1/200s or faster for handheld portraits is the safe standard. Use 1/125s as the floor for perfectly still subjects, 1/250s to 1/500s for kids and candid motion, and your flash sync speed, usually 1/160s or 1/200s, in the studio.
What ISO should I use for portrait photography?
ISO 100 to 400 in good light, 400 to 800 indoors, and up to 1600 to 3200 in dim venues without apology. A slightly noisy sharp portrait beats a clean blurry one every time.
What is the best aperture for portrait photography?
f/1.8 to f/2.8 for single subjects when you want creamy background blur. Stop down to f/4 or f/5.6 for couples, groups, and environmental portraits so everyone and everything important stays sharp.
Should I use Auto ISO for portraits?
Yes, set up properly. Enable Auto ISO with a maximum you trust and a minimum shutter speed of 1/200s, then shoot Aperture Priority. The camera raises ISO only to protect your shutter speed, which is exactly the trade you want.
Book Your Portrait Session
If you are in Los Angeles and want portraits with this level of intention behind them, I would love to shoot you. I have spent 27 years photographing celebrities, executives, and families, and every session gets the same discipline: the right settings, the right light, and your story front and center. Book your portrait session here. You can also browse my portrait work in the portfolio to see these settings in action.
What is the one camera setting you still second-guess on every shoot? Tell me in the comments, I read every one, and the most common answer becomes my next guide.