Group portrait lighting is the skill that separates a photographer who can handle a family of three from one a company trusts with forty employees. One person is easy. You place a key light, add a little fill, and you are done. Add a second row of people, different heights, different skin tones, glasses, bald heads, and suddenly every shadow you used to control falls on someone else's face.
The good news: group portrait lighting is simpler than the gear forums make it sound. The entire craft rests on one idea. One large, soft source, placed high and roughly on axis with the camera, covers almost any group you will ever face. Everything else in this guide is a variation on that idea, scaled up as the group gets bigger.
Below are seven setups that cover every group size, from a trio to a company all-hands, plus the camera settings that keep every face sharp and the mistakes that quietly ruin group shots. And because holiday gathering season is here, the timing could not be better. Families, teams, and friend groups all want the same thing right now: one great photo where everyone looks good.
- The short answer: what is the best light for group portraits?
- Watch: Gavin Hoey's one-flash group lighting (Adorama)
- The 7 group portrait lighting setups
- The one-light, on-axis group setup
- Two lights combined into one big source
- Key plus fill for small groups of 3 to 8
- The three-light system for large groups
- Bounced flash for events and receptions
- Natural light with reflector and fill flash outdoors
- LED continuous light for indoor groups
- Camera settings that keep every face sharp
- The mistakes that ruin group shots
- My group rules after 27 years
- Frequently asked questions
- Book your group session
The Short Answer: What Is the Best Light for Group Portraits?
The best light for group portraits is a single large, soft source placed high and on axis with the camera. A big octabox, large softbox, or large umbrella, raised above the group and angled down, spreads even, flattering light across every face and throws shadows behind people instead of onto the row behind them. Add a second light only when the group is too large for one source to cover, and use it as a second half of the same source, not from an opposite corner.
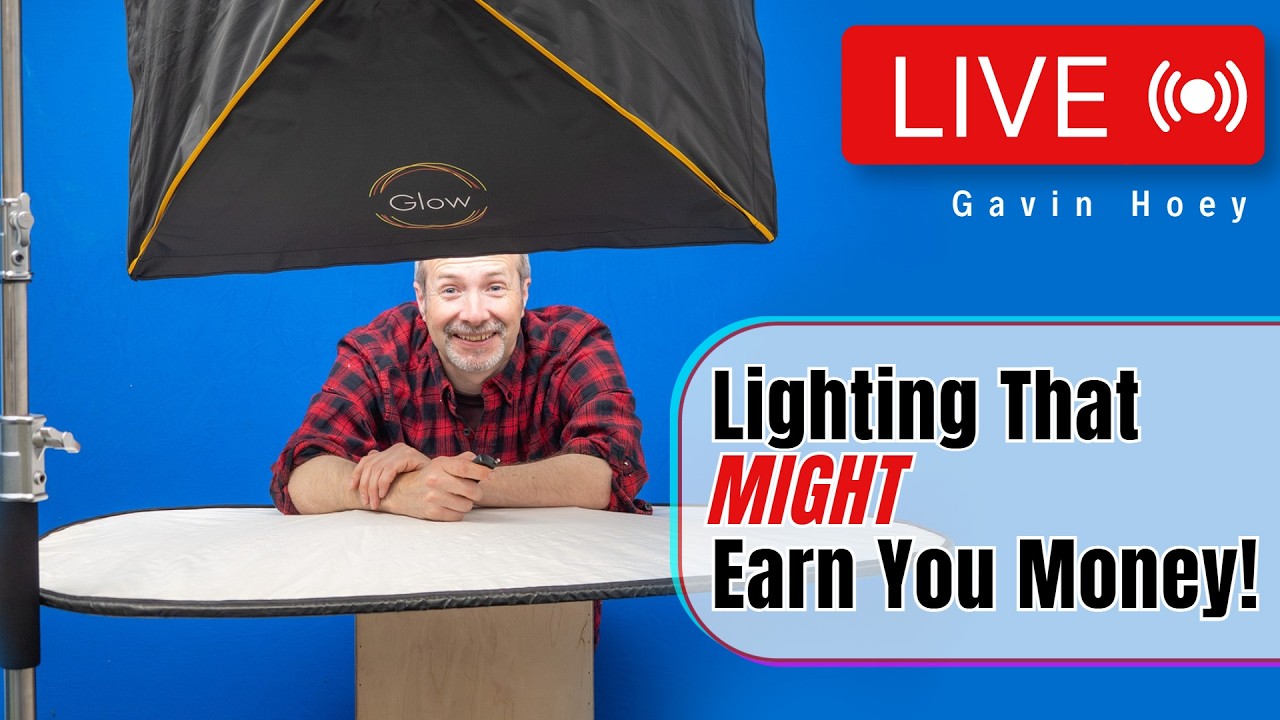
Watch: Gavin Hoey's One-Flash Group Lighting (Adorama)
Photographer and educator Gavin Hoey ran a live session for Adorama built around a simple premise: the basic lighting looks are the ones that pay the bills. He walks through three repeatable, single-flash setups for headshots, branding portraits, and group lighting, the commercial work most photographers actually get hired to do.
His group lighting approach is deliberately unglamorous. One flash, simple modifier, repeatable every time. That philosophy runs through this entire guide: for groups, reliability beats cleverness. A group of twelve impatient people does not care about your four-light ratio. They care that everyone is lit, everyone is sharp, and it took ten minutes. Watch the session below, then read on for the full breakdown of all seven setups.
The 7 Group Portrait Lighting Setups
1. The One-Light, On-Axis Group Setup
This is the setup Cole's Classroom calls the easiest group lighting plan ever, and I agree with him. Put a single light source up high, on axis with your camera, angled down toward the group. If you want a little direction in the light, pull it slightly off to one side, somewhere between zero and 45 degrees from center. More angle means more contrast and shape. Less angle means flatter, more forgiving light.
Why it works so well: one source creates one set of shadows, and because the light sits near the camera axis, those shadows fall behind people instead of onto the faces in the next row. That solves the single biggest group lighting problem before you take a frame. This setup covers class photos, team photos, and last-minute groups where you need to be fast. The tradeoff is honesty about the look: it is simple and a touch flat. For a corporate team photo, flat and clean is exactly what the client ordered.
Gear note: you do not need a big strobe to start. Practice with what you own. A single speedlight can light a small group if you choose your camera settings wisely, though for big groups you will want more power. Modifiers are personal preference, but bare flash is rarely flattering, so soften it.
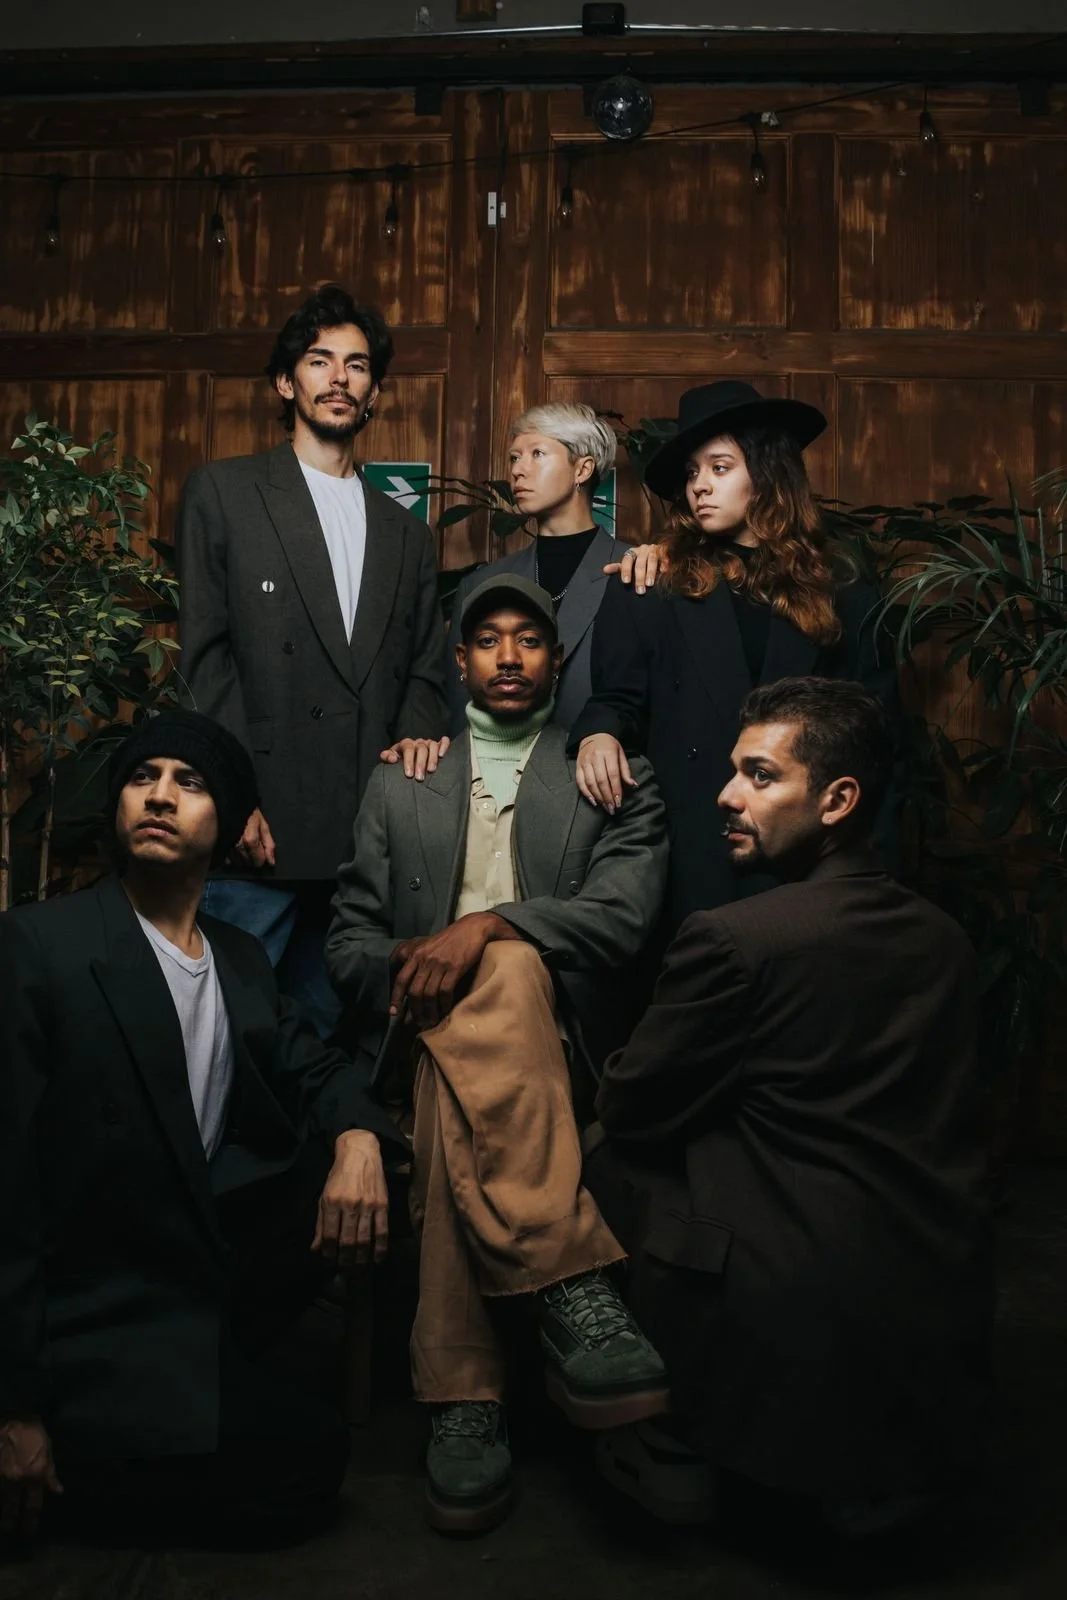
Indoor editorial group portrait of six people lit with soft on-axis flash, an example of even group portrait lighting
2. Two Lights Combined Into One Big Source
Sometimes one light is simply not powerful enough for a big group. The answer is not to light from two sides. It is to place two lights right next to each other, high and on axis, so they act as a single, more powerful source.
This is the setup most beginners get backwards, and Cole's Classroom explains why. New flash photographers instinctively put one light at each corner of the group, pointing toward the middle, thinking it will even things out. The opposite happens. Each light throws its own set of shadows, so you get two overlapping shadow patterns, and in a multi-row group those shadows land on the faces behind. You also get double catchlights and double reflections to manage in glasses.
Keep both lights together, high and near center. If you want a little more shape, shift the pair slightly off axis and feather them, angling the modifiers so the edge of the light skims the group instead of hitting it straight on. Feathering evens out hot spots and gives a gentler shadow transition across the row.
3. Key Plus Fill for Small Groups of 3 to 8
When you want contrast and depth instead of maximum flatness, move to a two-light key-and-fill arrangement. This is Cole's Classroom's preferred method for small groups of three to eight people, and it is mine too for editorial-style groups.
Place the main light to one side of the camera, between zero and 45 degrees off the subject axis. Put the second light on axis with the camera as fill. The fill must be weaker than the key, about one stop underexposed compared to the main light. If both flashes fire at equal power, the light goes flat and one-dimensional again, and you have added a second light for nothing.
This is the setup behind the indoor editorial group portrait above: one directional source giving the faces shape, one gentle fill on axis keeping the shadows open. For more on how single-light patterns scale to groups, read my portrait lighting patterns guide, which breaks down the five classic patterns and how each behaves when you widen the frame.
4. The Three-Light System for Large Groups
For twelve people and up, scale to three lights: key, fill, and rim. Retouching Labs, in their guide to wedding party lighting, recommends exactly this for large groups: raise the lights higher for coverage, watch the edges for falloff, and consider ambient light as part of the exposure.
Practical notes for big groups:
- Raise everything. Height is coverage. A light at head height lights the front row and leaves the back row dark.
- Use your largest modifiers. A large octabox or a big parabolic umbrella throws light everywhere, which is what you want. That Toronto Studio's corporate team guide makes the same point: very large, soft sources positioned for even coverage across the entire group, so no individual gets a harsh shadow while their neighbor is perfectly lit.
- Keep everyone inside the light zone. Check the edges of the frame. The person at each end of the back row is the one who goes dark.
- Add the rim or hair light from above or behind for separation from the background, but make sure it covers the whole group evenly, not just the middle.
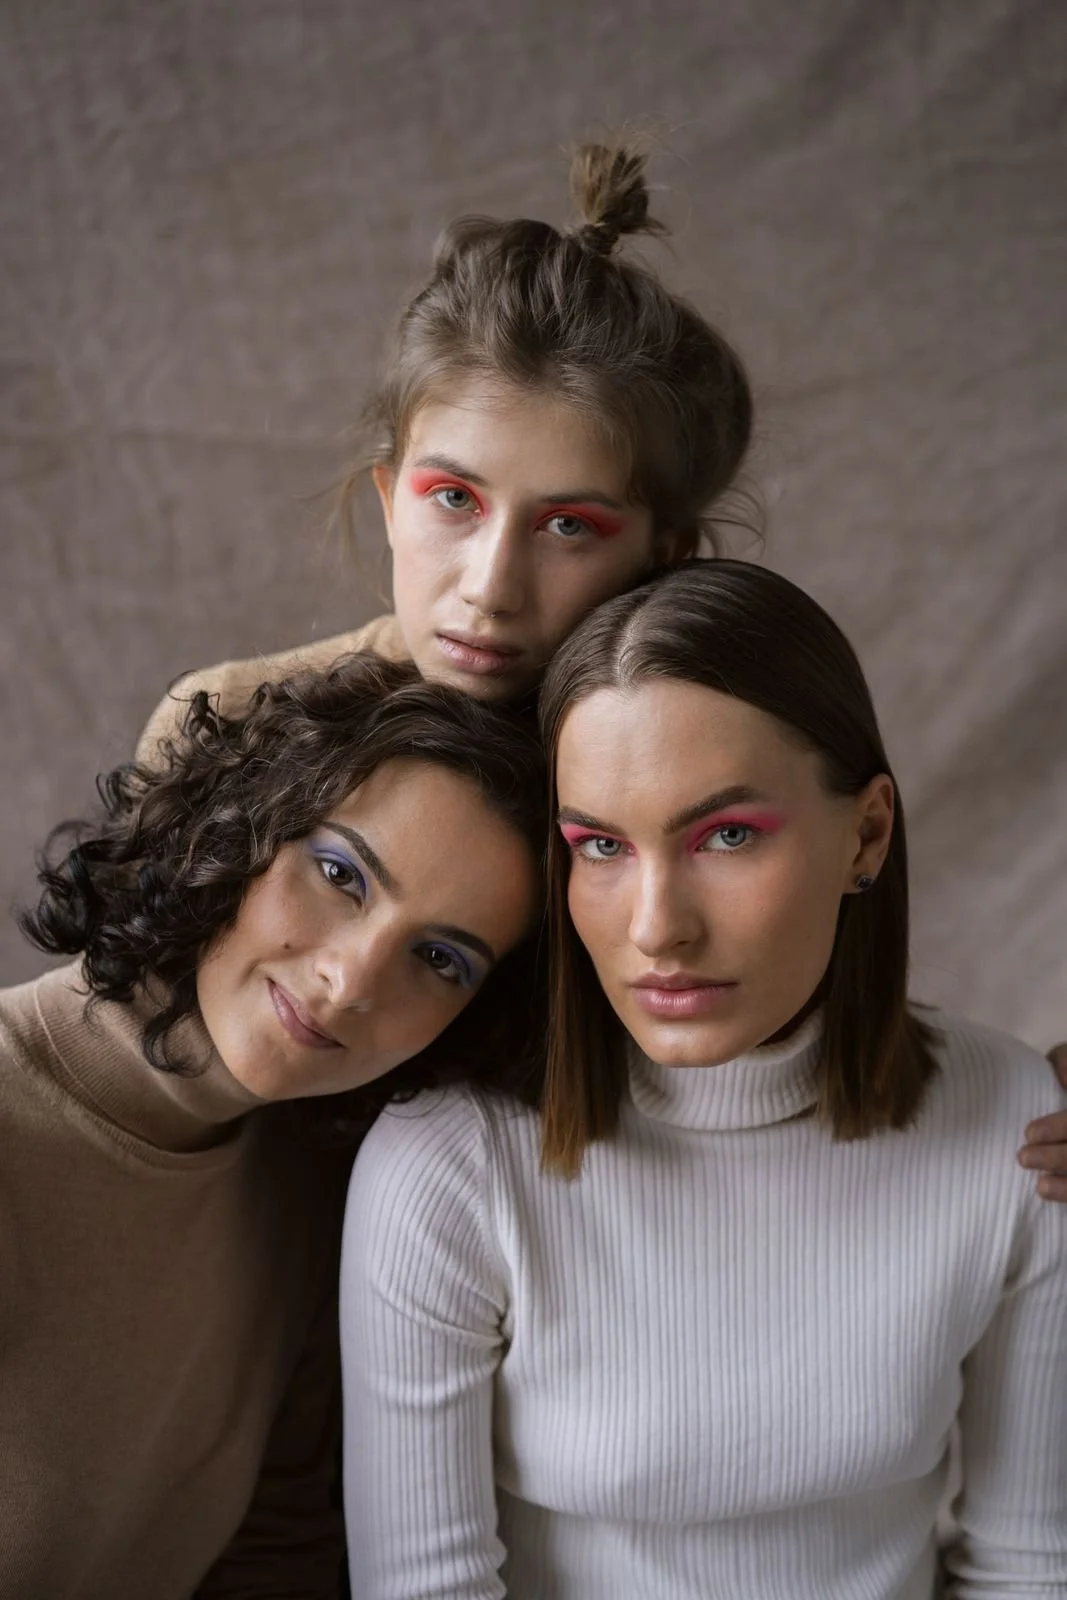
Studio trio portrait of three women with soft key light and gentle fill, showing flattering group portrait lighting on multiple faces
5. Bounced Flash for Events and Receptions
When you are moving through a reception, a holiday party, or any event where groups form and dissolve in seconds, you do not have time for stands and modifiers. Bounce the flash. Aim it at the ceiling or a nearby wall and let the room become your softbox.
Retouching Labs lists bounce flash as the first off-camera option for exactly this reason: it gives softer, more even results with zero setup time. The ceiling must be reasonably white and not too high. A dark wooden ceiling eats the light and tints it. In that case, bounce off a side wall or use a small on-flash diffuser and accept a slightly harder look. Speed matters more than perfection at events. Get the safe shot first, then experiment.
6. Natural Light With Reflector and Fill Flash Outdoors
Outdoors, the sun is your key light whether you like it or not, so the job becomes management. The Retouching Labs playbook for outdoor groups is: open shade first, golden hour when you can get it, subjects with the sun behind them plus a reflector or fill flash, and a scrim or translucent umbrella to diffuse harsh midday sun.
For groups specifically, open shade is the most underrated tool in photography. A building shadow or tree line gives you a giant soft source for free, and everyone in the group gets the same flattering light with no gear to carry. Add a 5-in-1 reflector for fill on the shadow side. If the sun is behind the group, which gives beautiful rim light on hair and shoulders, add fill flash so faces do not go muddy. Use high-speed sync to balance flash against a bright background.
One warning from the corporate team world: watch the ground. Bright concrete or sand bounces light up under chins, and dark asphalt absorbs it. Position the group with the background in mind, not just the light.
7. LED Continuous Light for Indoor Groups
LED panels have earned a real place in group work. Retouching Labs points out the practical advantages: what-you-see-is-what-you-get preview of shadows, no recycle time for fast-moving groups, and easy color temperature adjustment when the venue mixes tungsten, daylight, and LED strips.
LEDs shine with groups who flinch at flash: kids, corporate executives mid-meeting, anyone who blinks at the pop. Sometimes the best light is the one your subjects will sit still for. If you are choosing between the two systems, read my strobe vs continuous lighting comparison, which walks through the full decision.
Camera Settings That Keep Every Face Sharp
Lighting is half the job. These are the settings that keep a group sharp from the front row to the back:
- Aperture: f/5.6 to f/8. This is the non-negotiable. A wide aperture that looks dreamy on one person leaves the back row soft. Cole's Classroom starts every flash session at 1/160, f/5.6, ISO 100, calling it "middle C on a piano": a reset point you can always return to when exposure gets confusing. For deep groups, stop down to f/8.
- Shutter speed: at least 1/160 with flash. That keeps you safely under the max sync speed and freezes small movements. Handheld without flash, stay at 1/200 or faster, quicker with kids.
- ISO: as low as the light allows, but do not fear it. A noisy sharp photo beats a clean blurry one. Modern cameras handle ISO 1600 to 3200 cleanly, which is often what indoor group work demands.
- Focal length: 35mm and up. Wide angles distort the people at the edges of the frame, stretching the end subjects wider than they are. Step back and use a longer lens. A 45 to 50mm equivalent is the sweet spot for groups.
- Focus: single point on a face in the middle row. With f/8 and a middle-row focus point, depth of field covers the rows in front and behind.
The Mistakes That Ruin Group Shots
Cross-lighting from opposite corners. Two lights, two shadow sets, shadows falling on the row behind. Keep sources together and near axis. This is the most common beginner error and the easiest to fix.
Front-row shadows on back-row faces. Side lighting is the usual cause. More frontal, even lighting, or wider spacing between rows, solves it. This is the problem That Toronto Studio's team guide flags as the central challenge of group work.
Overhead light with no fill. A light directly above without frontal fill carves dark sockets under eyes and brows. Raise the light and angle it down, do not park it overhead like a streetlamp.
Mixed clothing exposure. A group in black suits next to bridesmaids in white dresses is an exposure puzzle. Expose to hold detail in both, raise ambient fill slightly, and check the histogram. Do not trust the LCD.
Skipping the test shot. Set up and dial in your lights before the group arrives. Nothing erodes confidence like fiddling with stands while fifteen people stare at you. Pre-light, test on an assistant or a chair, and be ready when the group walks in.
My Group Rules After 27 Years
Here is what 27 years of photographing people has taught me about lighting groups, and none of it came from a tutorial.
First: the group shot is a directing job that happens to involve lights. I have spent months at a time on fashion sets in Miami directing three or four models a day, every day, and the shoots that worked had one thing in common. The lighting was decided before anyone arrived. When you are responsible for a dozen faces, the technical decisions must be finished before the human decisions begin, because you will not have attention left for both. I light the empty set, I test it, and then I forget about the gear and spend every remaining ounce of energy on the people.
Second: groups sink to the lowest energy in the room. One bored person infects ten. So I move fast and I stay loud, not with volume but with certainty. "Chin down a touch, you are perfect, now everyone look at me on three." Hesitation is contagious. Certainty is too. This is the same discipline that got me through nightclub shoots in 2007 with unknown artists and packed rooms. You do not get a second take when the room is moving.
Third: get the safe shot first, always. The creative version, the dramatic version, the one where you try something clever, all of that comes after you have the clean, evenly lit, everyone-smiling frame in the can. I learned that directing hundreds of celebrities. The person paying you wants the safe shot. The portfolio wants the brave one. Shoot them in that order and you never have to choose.
Fourth: groups are where the money is. Headshots, branding sessions, team photos, holiday family portraits. These are the repeatable, referable jobs that keep a studio alive between the glamorous assignments. Take them seriously, light them well, and deliver fast. A company that loves its team photo hires you for the holiday party, the product launch, and the executive portraits. One good group shot has booked me more work than any single dramatic portrait ever did.
If you want help with posing once the lights are set, read my guide to posing people who are not models, the directing system I use on every group, and the holiday mini-session workflow, which shows how I compress all of this into fifteen profitable minutes.
Frequently Asked Questions
What type of light is best for group portraits?
A single large, soft source placed high and on axis with the camera. Large octaboxes, big softboxes, or large umbrellas spread even light across every face and keep shadows behind people instead of on the row behind them. Add more lights only as the group grows, and keep them working as one source.
What f-stop should I use for a group photo?
Between f/5.6 and f/8. At f/5.6 with focus on the middle row, a typical two-to-three-row group stays sharp front to back. For deeper groups, stop down to f/8. Wider apertures like f/2.8 will leave back-row faces soft, which is the fastest way to ruin an otherwise perfect group shot.
How do you light a large group photo?
Use the three-light approach: key, fill, and rim, all raised high with your largest modifiers. Position the group in a slight arc so the ends stay inside the light zone, pre-light before anyone arrives, and expose for the widest clothing range in the group. For very large groups outdoors, you may need a powerful strobe rather than speedlights to balance daylight.
Can I light a group with just one speedlight?
Yes, for small groups indoors. Bounce it off a white ceiling or pair it with a large umbrella, keep it high and near the camera axis, and use f/5.6 at ISO 800 to 1600. One speedlight will not overpower bright sun or cover a large group evenly, which is when you step up to strobes or add a second light as part of the same source.
Should I use flash or continuous light for group portraits?
Flash gives you more power and freezes motion, which matters for big groups and outdoor fill. Continuous LED light gives you a live preview and no recycle time, which matters for nervous subjects and fast pacing. For most paid group work, flash is the workhorse and LED is the specialist tool. Match the tool to the group in front of you.
Book Your Group Session
Holiday season is group portrait season. Family gatherings, company teams, holiday parties, and friend groups all need one photo where everyone looks great, and that photo does not happen by accident. It happens with the right light, the right settings, and a photographer who has directed hundreds of groups.
I photograph group portraits, team photos, and holiday sessions across Los Angeles. Get in touch through my contact page and tell me about your group: how many people, indoor or outdoor, and what the photo is for. I will handle the light. You handle getting everyone in the same room.
What is the largest group you have ever had to light, and what saved the shot? Tell me in the comments.