Holiday family portrait lighting is the hardest lighting most photographers ever face, and it happens in the worst possible room. December gives you a few hours of usable daylight, the living room is lit by four different bulb types, the Christmas tree is glowing in the corner, and everyone you need to photograph is impatient, overdressed, and hungry. No studio, no assistants, no second takes. The good news is that some of the most flattering portrait light in existence is already in that house. You just have to organize it.
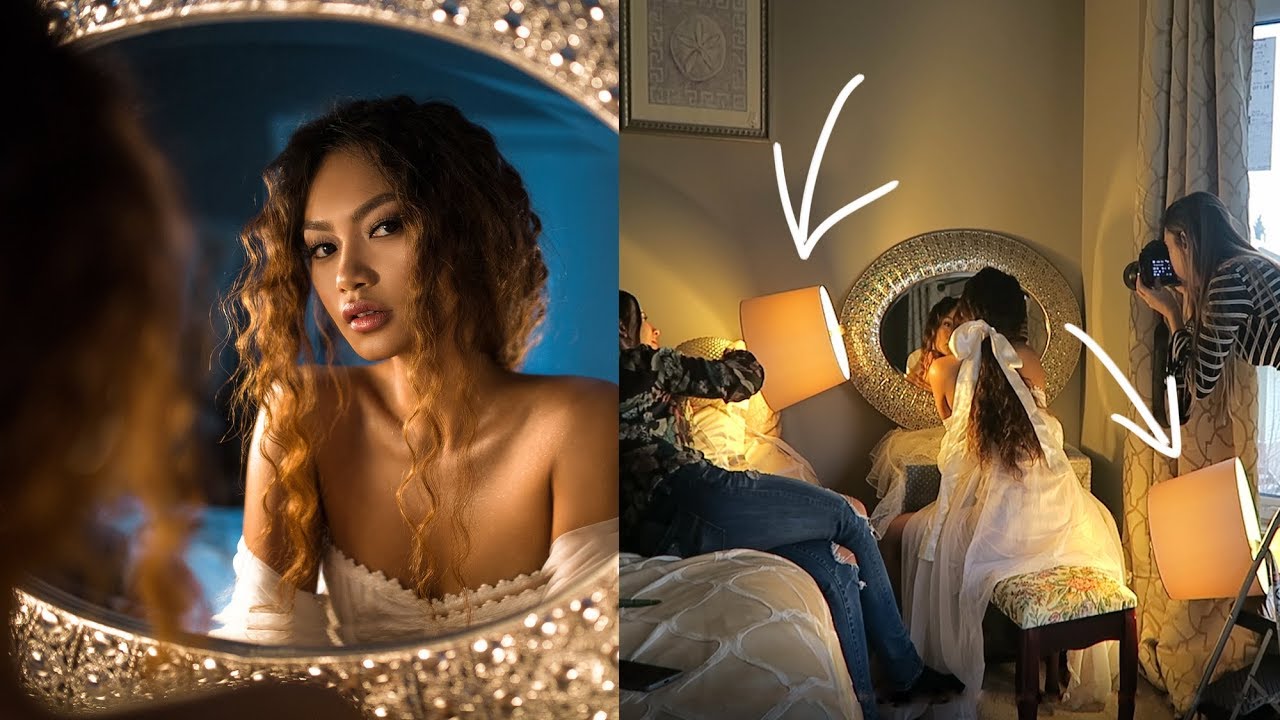
The video for this post comes from Canadian portrait photographer Irene Rudnyk, who has built a career on making pro-quality portraits at home without complicated or expensive gear. In it she works through four indoor setups using nothing but window light and ordinary table lamps, including a method for mixing warm tungsten light with cool daylight streaming through a window. Everything below expands her framework into a complete system for holiday family portraits, with the camera settings, white balance discipline, and group tactics that turn a chaotic living room into a portrait studio.
In this guide:
The Video: Four Indoor Setups That Actually Work
Rudnyk's tutorial is structured as four lighting setups, all shot in a normal home. Here is the framework in my own words.
Setup one is window light as the only illumination. She places her model near a large window and shoots simple portraits, letting the window act as a giant softbox. The lesson is about distance and direction. Moving the subject closer to the window raises the light and deepens the shadows on the far side of the face. Moving them away flattens and softens everything. This is the foundation of every indoor family portrait that works.
Setup two switches to table lamps as the main light source. Ordinary household lamps, the kind sitting on every end table in America, become the key light. Tungsten bulbs burn warm, which is exactly the cozy glow people associate with the holidays. Used deliberately, a lamp gives you a motivated, cinematic key light with real direction. Used carelessly, mixed with daylight, it gives you orange faces and blue windows.
Setup three is the backlit portrait. She places her model in front of the window so the daylight rims the hair and shoulders, then brings a lamp around to lift the face. This is the single most useful configuration for holiday portraits, because it is exactly the geometry of a family standing in front of a lit Christmas tree or a bright window in December.
Setup four combines two lamps with the model facing the window. Two warm practicals plus cool daylight, balanced by position and exposure. She also works posing into every setup, because light without direction is just illumination.
That is the video. The seven techniques below are how I would apply it to a real family in a real house at Christmas.
Why Holiday Family Portrait Lighting Is So Hard
Three problems stack up in every December living room.
First, mixed color temperature. The ceiling cans might be daylight LEDs, the table lamp is a warm tungsten bulb, the tree lights are warm white, and the window is overcast sky. Your camera can only white balance for one of these. Pick wrong and someone's skin goes orange, green, or gray.
Second, low light with moving subjects. Kids do not hold still. Grandparents blink. You need shutter speeds fast enough to freeze people, in rooms that barely have enough light for a proper exposure, and flash changes the mood you are trying to capture.
Third, space. A family of six in a living room with a tree, a couch, and a coffee table gives you a few feet of working room. There is no place for a softbox, no assistant to hold a reflector, and no time to build anything complicated.
The whole system below is designed around these three constraints.
The 7 Pro Techniques
1. Build the portrait around the window, not the tree
The tree is the decoration. The window is the light. In every house, find the biggest window first and stage the family near it. Turn everyone to face the window, or angle them about 45 degrees off it so the light rakes across faces and gives you real modeling.
Rudnyk's first setup proves you need nothing else. A large window is a softbox you did not have to buy, carry, or power. Shoot in the two or three hours when daylight is brightest, and plan the formal group shots for that window of time. Save the candids and the tree-light portraits for after dark.
If the window light is too contrasty and one side of the face goes muddy, bounce a little fill back with anything white. A pillowcase, a poster board, a white bedsheet held by a cooperative uncle. Improvising with makeshift reflectors is one of the keys to getting indoor holiday portraits right in a crowded house, a point the photographers at ePHOTOzine make in their festive portrait guide.
2. Kill the mixed light before you add any light
This is the single biggest upgrade most holiday portraits can get, and it costs nothing. Before you take a single frame, turn off every light you do not intend to use. Overhead cans, hallway lights bleeding in, the TV, all of it. Every source you leave on is another color temperature fighting your white balance.
You want at most two light sources in the frame, and ideally doing different jobs. Cool window light on the faces, warm tree lights in the background. Warm lamp as the key, window as the cool rim. What you never want is three overhead bulbs, a TV, and a window all contributing equally. That is how skin tones go wrong in ways no preset can fix.
3. Set your white balance like you mean it
Auto white balance will betray you in a December living room. The camera sees warm lamps and cool windows and averages them into something nobody looks good under. Set it yourself.
If the room is lit mostly by household bulbs, switch to the tungsten (incandescent) preset, which ePHOTOzine recommends specifically to minimize the unnatural yellow and orange casts that conventional lighting causes. If window light dominates, use the daylight or cloudy preset. If you are mixing a warm lamp with cool window light on purpose, set a custom white balance off a gray card or a white wall, then shoot RAW so you can fine tune individual frames later. White balance is the difference between skin that looks alive and skin that looks wrong.
4. Turn the Christmas tree into a designed background
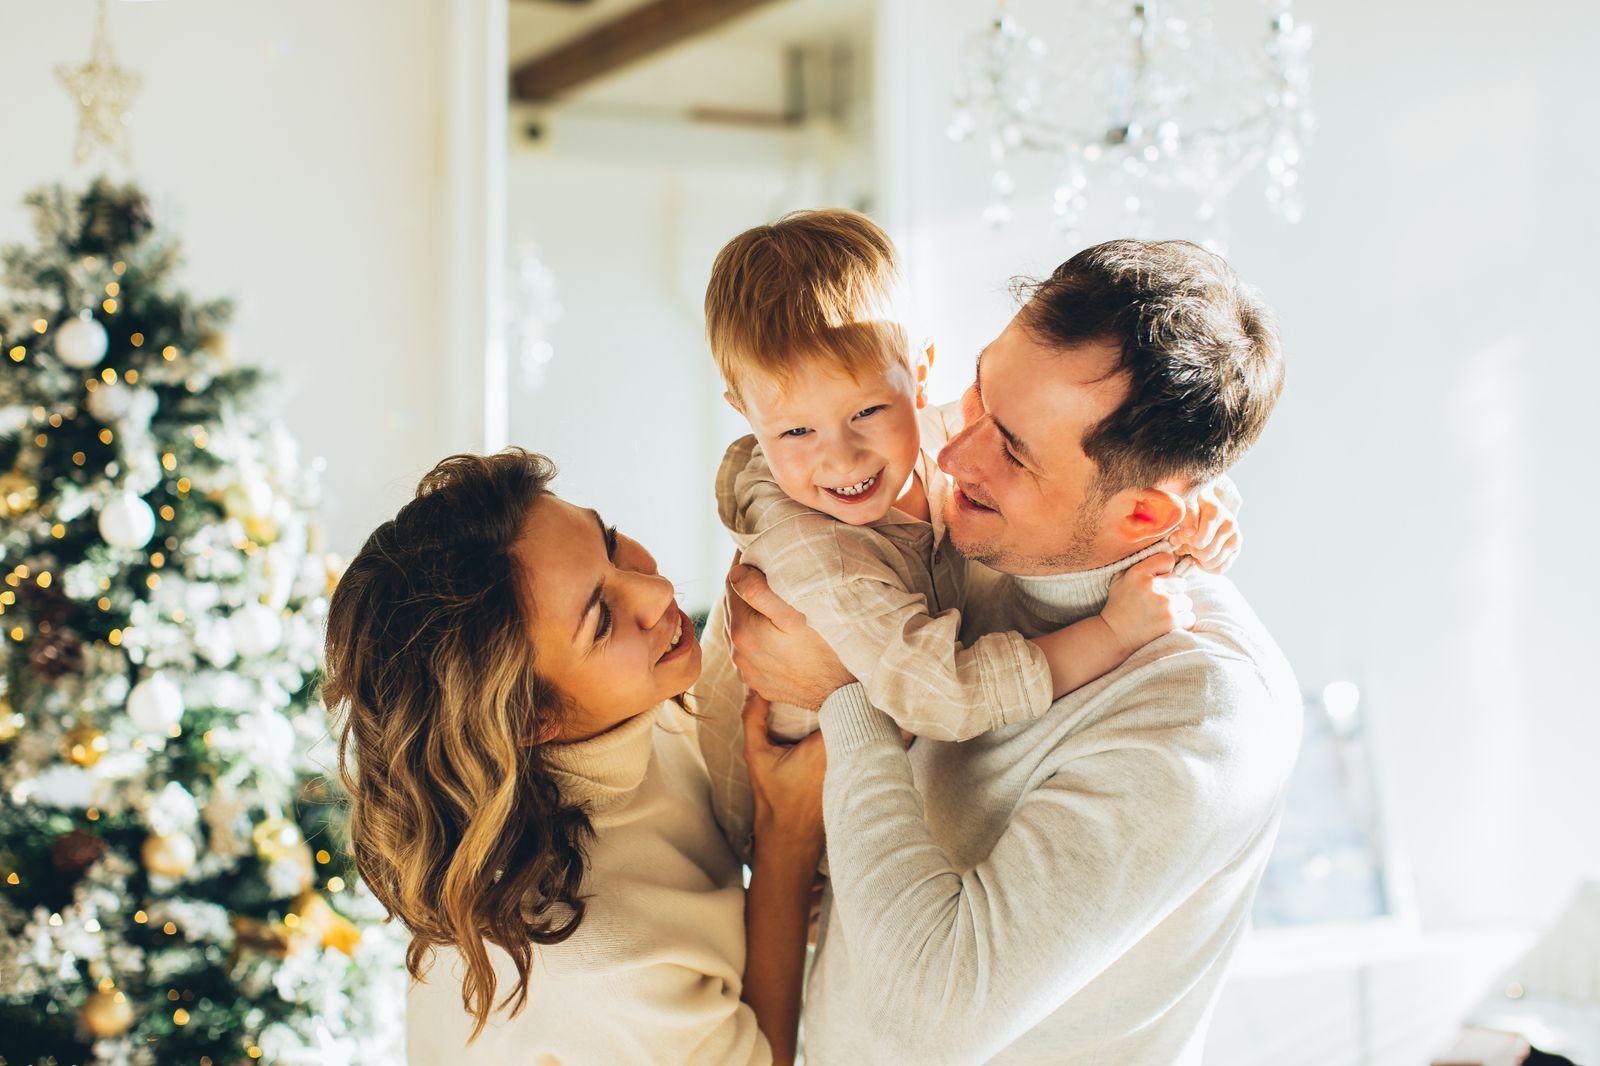
The tree is the best background light most homes will ever have, if you treat it like a background instead of an accident. Put distance between the family and the tree. The further the lights are behind your subjects, the larger and softer they render as bokeh, and the closer you shoot, the stronger the effect gets. This is the core technique Daniel Norton demonstrates in PictureCorrect's Christmas light portrait tutorial: he moved the model away from the tree and stood himself back against the wall, maximizing subject to background distance.
Open the aperture. At f/5.6 the lights render as small dots. Open up to f/2.8 and the same lights bloom into large glowing orbs while the strings and hardware dissolve. Norton also shows the exposure trick that makes the lights sing: slow the shutter down, he went to 1/15 of a second, and the lights get brighter while a TTL flash holds the exposure on the subject. Use a tripod for anything that slow, and shoot in bursts so you have sharp frames to choose from.
One more move from that tutorial: drape a string of lights in front of the lens, well out of focus, for foreground bokeh that frames the family in glowing color. Keep it at the edges of the frame so it never covers a face.
5. Put a lamp to work as a real light
Rudnyk's second setup is the one most photographers ignore, and it is the most useful. A table lamp is a small, warm, directional source, which makes it a perfect key or rim light for one or two people.
For a couples portrait or a parent with a child, place a lamp to one side and slightly in front of the subjects, then turn off the overheads and let the lamp do the work. The falloff is fast and dramatic, which reads as cozy and cinematic in a way flat overhead light never will. For a backlit family group, the way Rudnyk does it in setup three, let the window or the tree light the background and swing a lamp around to the camera side to lift the faces. You are essentially building a two-light portrait with furniture.
Watch the color. If the lamp is tungsten and the window is daylight, the faces will go warm while the background goes cool. That contrast is often beautiful, but it has to be a choice, which is why technique three comes first.
6. Light small groups, not crowds
The classic failure of holiday family portrait lighting is trying to light eight people evenly in a dark room. Do not. Break the family into smaller groups: grandparents with the kids, siblings together, each couple, and the whole group only once or twice for the record.
Smaller groups are easier to light, faster to pose, and more natural, which is exactly what ePHOTOzine recommends for festive portraits. Everyone relaxes when they are not holding a pose for two minutes while you fiddle with settings. Shoot the big group first, while patience is fresh, then release people into the smaller combinations where the real expressions happen.
Stagger depth. Put one row slightly behind the other instead of lining everyone up against a wall. Depth gives the light somewhere to fall off, and falloff is what makes a portrait look like a portrait instead of a driver's license photo.
7. Use the settings that survive indoors
Start here and adjust: aperture f/4 for groups, f/2.8 or wider for couples and bokeh backgrounds. ISO 800 to 3200 on a modern body, higher if you must, because a sharp noisy frame beats a clean blurry one every time. Shutter speed at least 1/125 for groups with kids, 1/60 minimum for still adults, and a tripod the moment you go slower for ambient light effects.
Shoot RAW, always. Shoot in burst mode when kids are in the frame, because the best expression happens between the posed frames. And expose for the faces, letting the tree lights blow out slightly. Blown highlights in Christmas lights look like magic. Blown highlights on a forehead look like a mistake.
What 27 Years Taught Me About Light in Real Rooms
I learned indoor portrait lighting the hard way, in apartments, not studios. Early in my career I lived in a Miami apartment with incredible natural light pouring through the rooms, and the deal was simple: models from a local agency came through every day, I photographed them, and the apartment was my studio. No softboxes, no crew, just windows, white walls, and whatever lamps were in the room. I shot hundreds of sessions there, and every one of them taught me the same lesson: the light you have is enough if you learn to see it.
Years later I shot Jaime Pressly on a downtown Los Angeles rooftop for her clothing line. She had styled the set herself, a bohemian Moroccan setup with a lamp and an arabic rug, shot in the soft glow of sunset. That lamp was not a prop, it was part of the light, and those images ran everywhere, from US Weekly to Vogue. A working photographer does not wait for perfect conditions. You take the lamp that is there, the window that is there, and you make the picture.
That is the discipline I bring to every holiday session, and it is the same discipline I write about in my book: practice, practice, practice, never stop learning. Families are the toughest subjects in photography. They are distracted, they are on a schedule, and nobody in the room cares about your histogram. So I keep it simple. Window first, one warm source second, white balance set with intention, and the session moves fast. In 27 years and more than 300 celebrity shoots, the sessions that work are never the complicated ones. They are the ones where I saw the light that was already there and got out of its way.
If you want this handled for you, I shoot holiday family sessions in Los Angeles every December. The booking link is below, and October is when the calendar fills.
Frequently Asked Questions
What is the best lighting for indoor family portraits?
A large window is the best light source in almost every home. Position the family facing it or angled about 45 degrees off it, turn off competing overhead lights, and use a white reflector for fill if one side of the face goes too dark. This is the foundation of Rudnyk's first setup and the starting point of every technique above.
How do I avoid orange skin tones in indoor holiday photos?
Orange skin comes from mixing tungsten bulbs with daylight while the camera guesses. Turn off lights you are not using, set the tungsten white balance preset when lamps dominate, and shoot RAW so you can correct precisely later. One color temperature per job is the rule.
What camera settings should I use for indoor family portraits?
A reliable starting point is f/4 for groups, ISO 800 to 3200, and a shutter speed of at least 1/125 when kids are moving. Open to f/2.8 or wider for Christmas-light bokeh, and use a tripod if you slow the shutter to brighten ambient lights. Shoot RAW and expose for the faces.
How do you photograph a family in front of Christmas lights?
Maximize the distance between the family and the tree, get close to your subjects, and shoot wide open around f/2.8 so the lights dissolve into large bokeh orbs. To make the lights glow brighter without overexposing faces, slow the shutter speed and let a TTL flash hold the subject exposure, a technique Daniel Norton demonstrates in PictureCorrect's tutorial.
Book Your Holiday Session
October and November are when holiday family sessions book out. If you want portraits like these without learning white balance the hard way, book a session. I shoot on location across Los Angeles, and I bring the calm version of this whole system with me.
Want to see how I handle light in other situations? My guides to portrait lighting patterns, golden hour portraits, and environmental portraits cover the rest of the toolkit. If you are planning the business side of the season, my holiday mini-session workflow breaks down the 15-minute system that fills December. And if your subjects freeze up in front of the lens, start with how to pose people who are not models.
Which room in your house has the best window light, and have you ever actually photographed your family in it? Tell me in the comments.